Hanging indent explained
Summary
A hanging indent is a paragraph format where the first line is flush left while every subsequent line is indented inward. This style is particularly useful for bibliographies, glossaries, and legal citations, as it visually distinguishes the first line from the rest of the entry, making it easier to read and reference.
- A hanging indent keeps the first line flush left.
- It's commonly used in bibliographies and reference lists.
- To create one in ONLYOFFICE, use paragraph settings.
- Avoid manual tabs or spaces for consistent formatting.
- Check your style guide for the correct indent value.
When formatting a bibliography, a glossary, or a list of legal citations by hand (hitting Tab, hitting Enter, hitting Tab again for every single entry) a hanging indent is the fix you’ve been missing. Instead of indenting the first line of a paragraph, a hanging indent pushes in every line except the first, keeping the opening word flush left while the rest of the entry wraps neatly underneath. This guide covers what a hanging indent is, when to use it, and how to set one up.

What is a hanging indent?
A hanging indent (also called a “second-line indent”) is a paragraph format where the first line starts at the left margin and every subsequent line is indented inward. It’s the mirror image of a standard first-line indent, which pushes only the opening line inward and leaves the rest flush left.
Example:
Smith, J. (2024). The history of typography.
Oxford University Press.
The author’s name stays visible at the left edge, and the rest of the citation wraps beneath it. That visual anchor is exactly what makes hanging indents so common in reference lists.
How hanging indents work: The mechanics
A hanging indent is controlled by two separate paragraph settings, not by manual tabs or spaces:
- First line indent: set to 0, so the first line sits at the paragraph’s left margin.
- Indent (left): set to a positive value, which shifts the paragraph’s overall left edge inward.
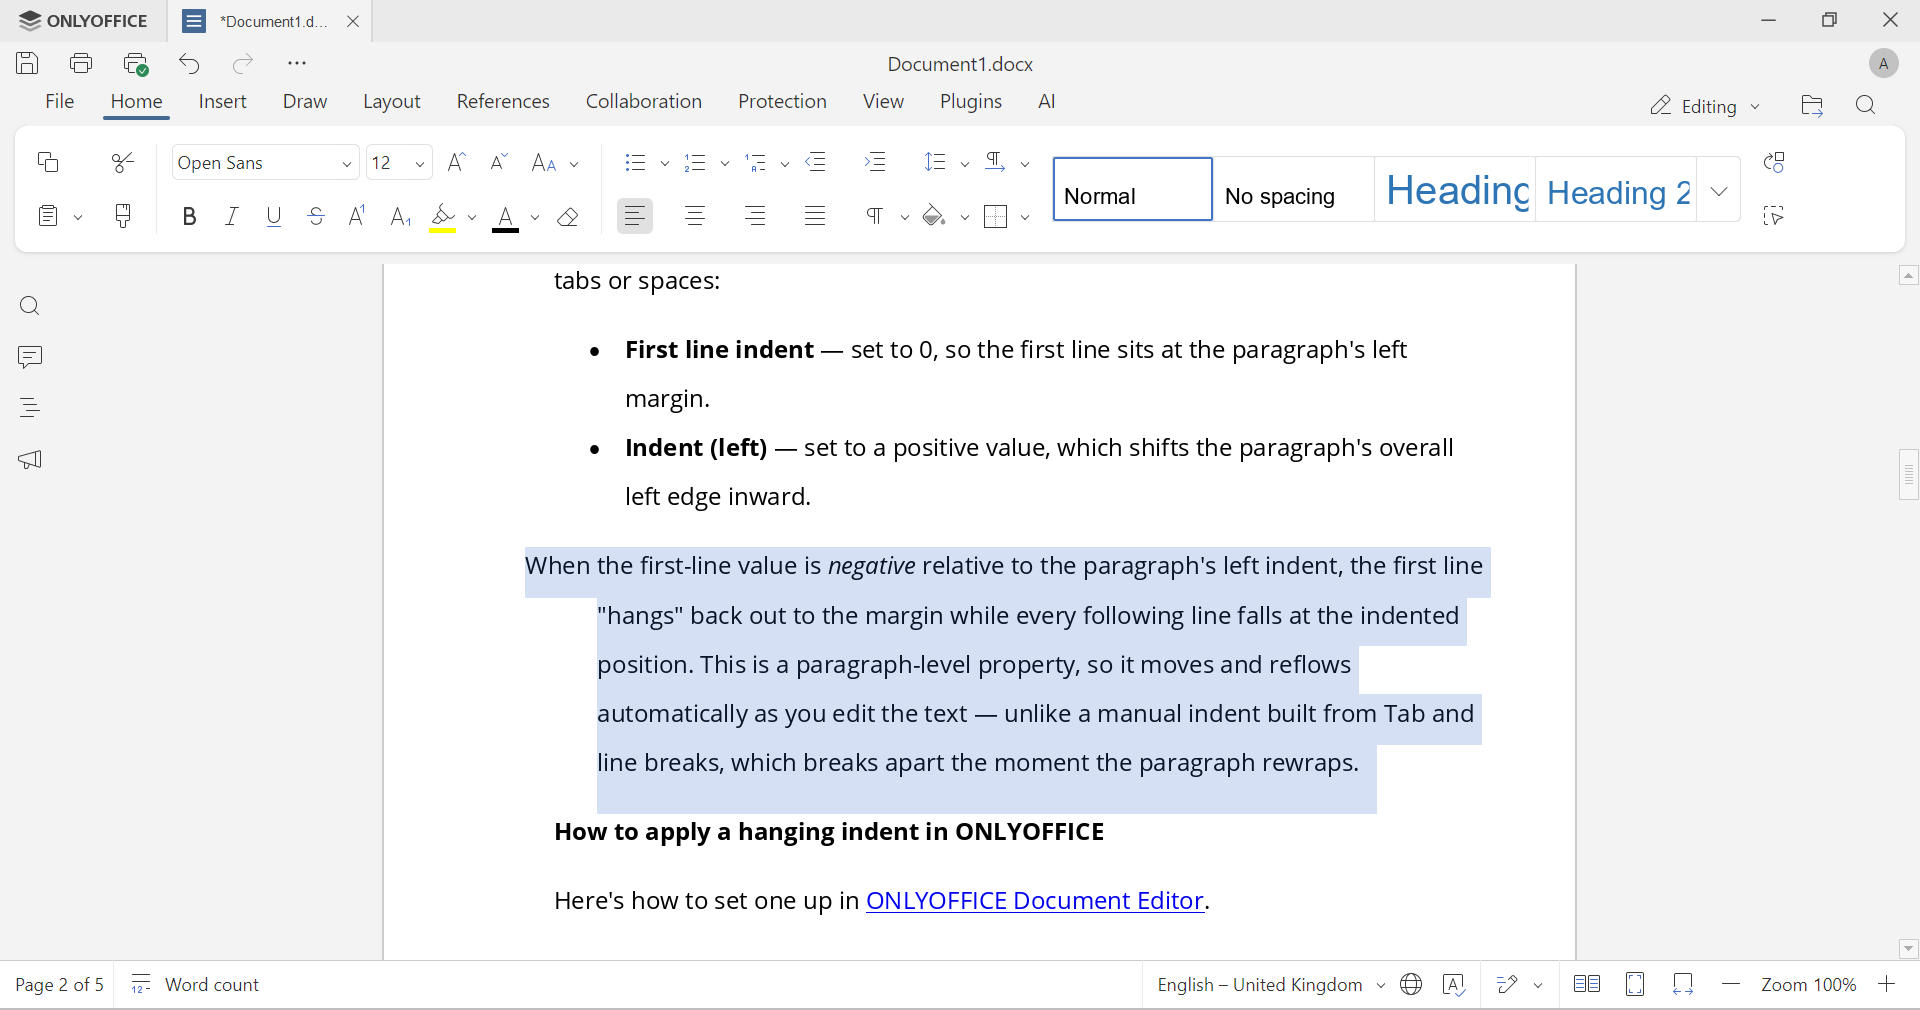
When the first-line value is negative relative to the paragraph’s left indent, the first line “hangs” back out to the margin while every following line falls at the indented position. This is a paragraph-level property, so it moves and reflows automatically as you edit the text. Unlike a manual indent built from Tab and line breaks, which breaks apart the moment the paragraph rewraps.
How to apply a hanging indent
Now let’s see how to set a hanging indent using ONLYOFFICE Document Editor.
First, select your text
- Place the cursor inside a single paragraph to format just that one.
- Select several paragraphs with the mouse to format them all at once.
- Press Ctrl+A to apply the hanging indent to the entire document.
Then apply the hanging indent using either of these two methods.
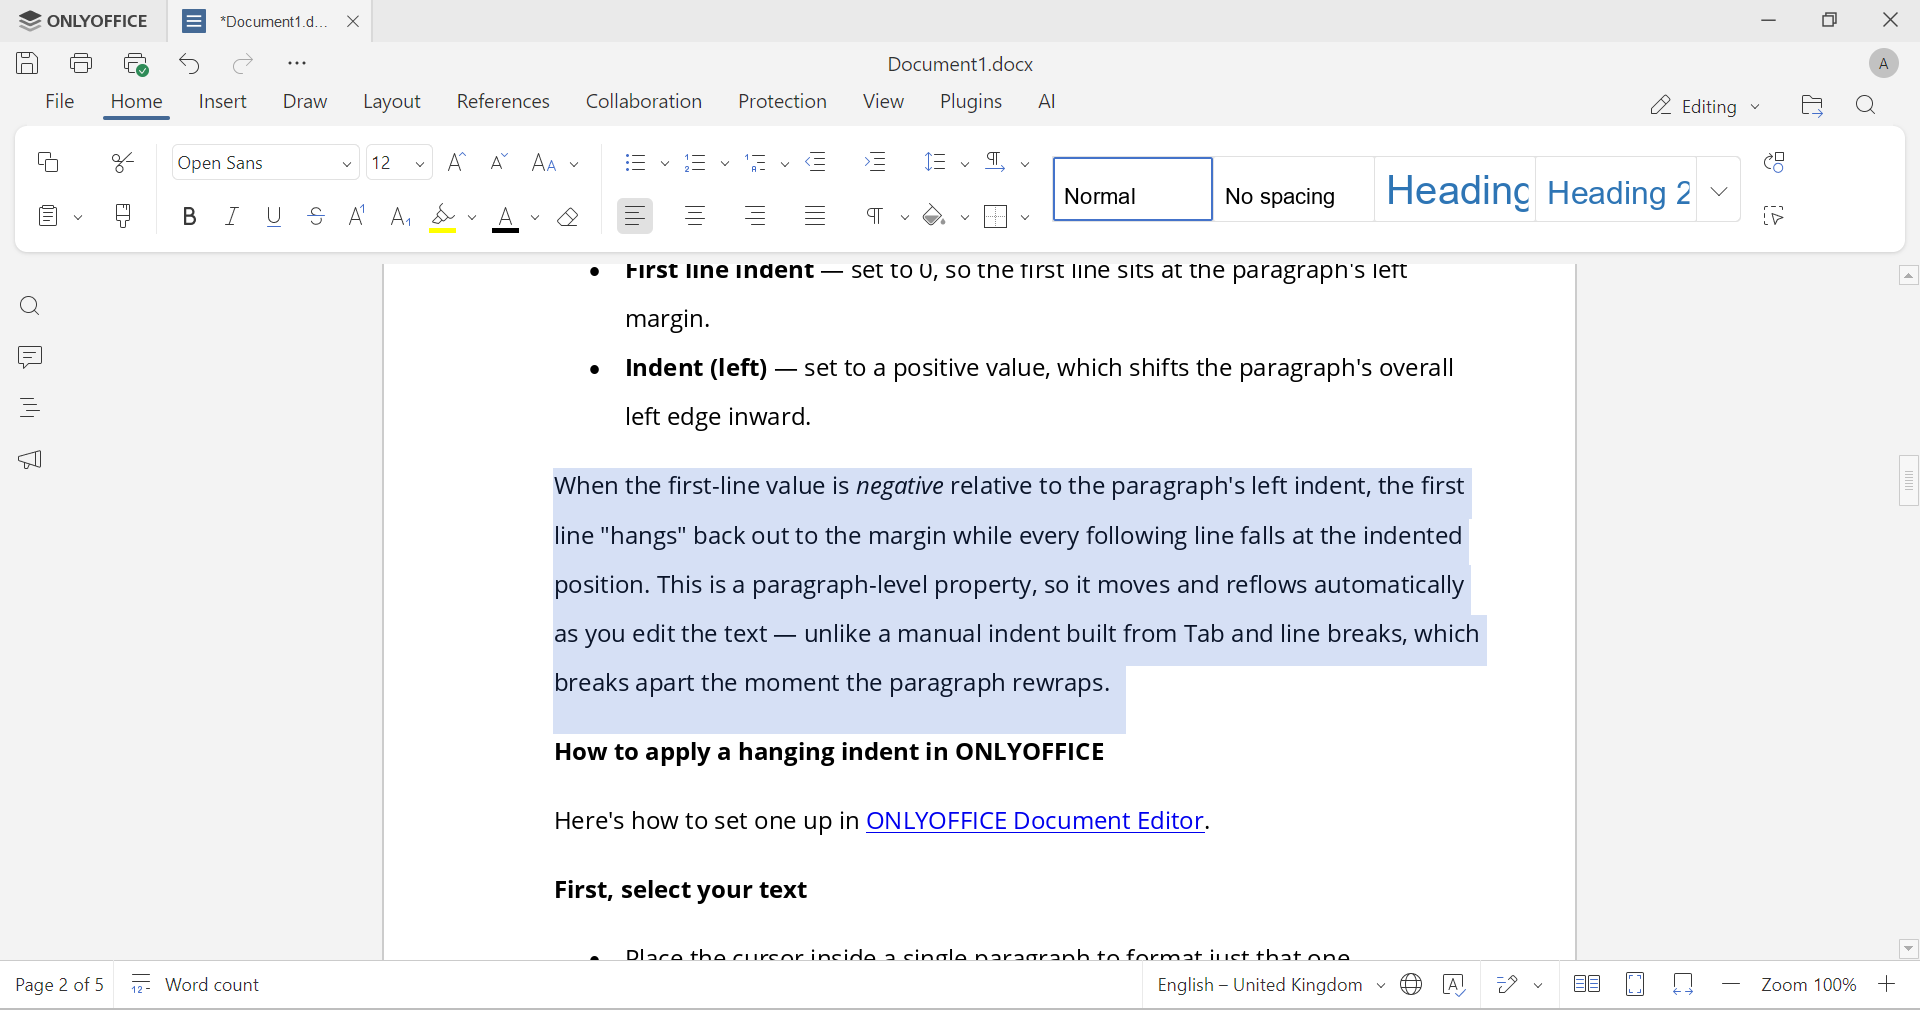
Method 1: Paragraph Advanced Settings
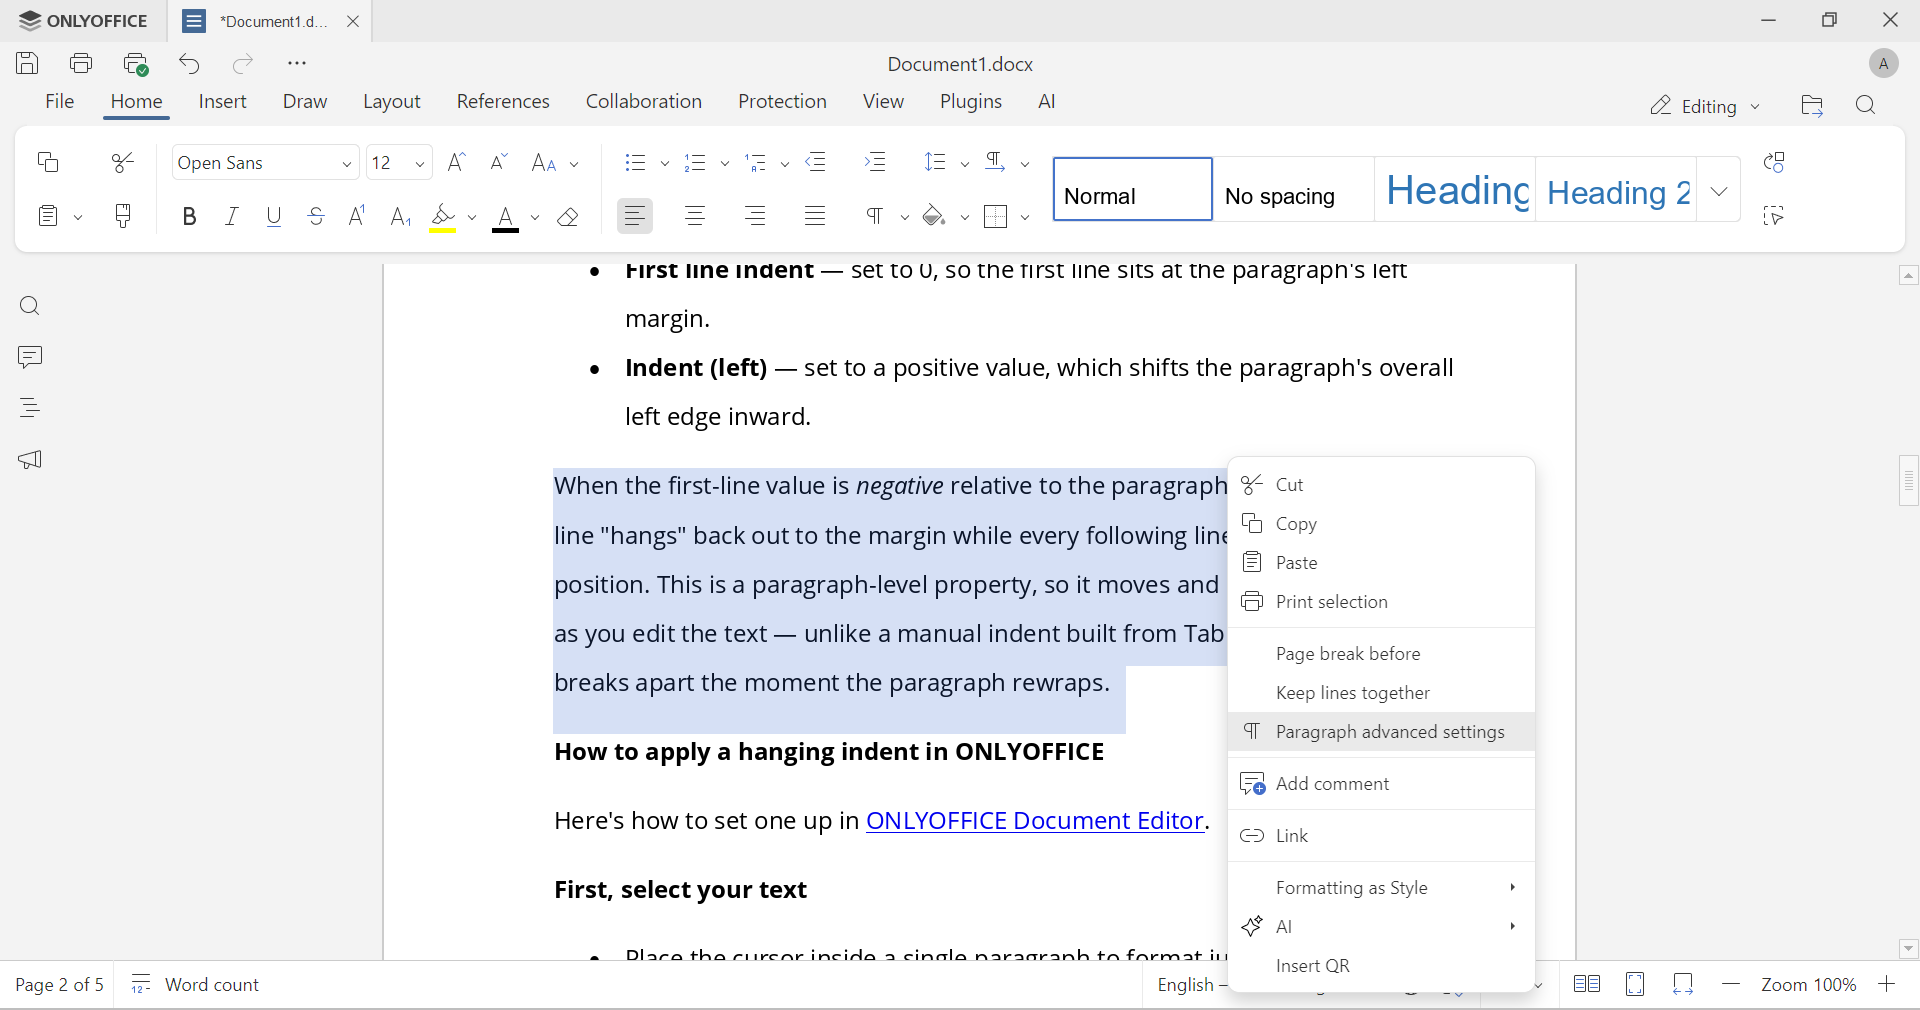
- Right-click the selected text and choose Paragraph Advanced Settings (or use Show advanced settings in the right sidebar).
- Switch to the Indents & Spacing tab.
- In the Indents section, open the Special dropdown and select Hanging.
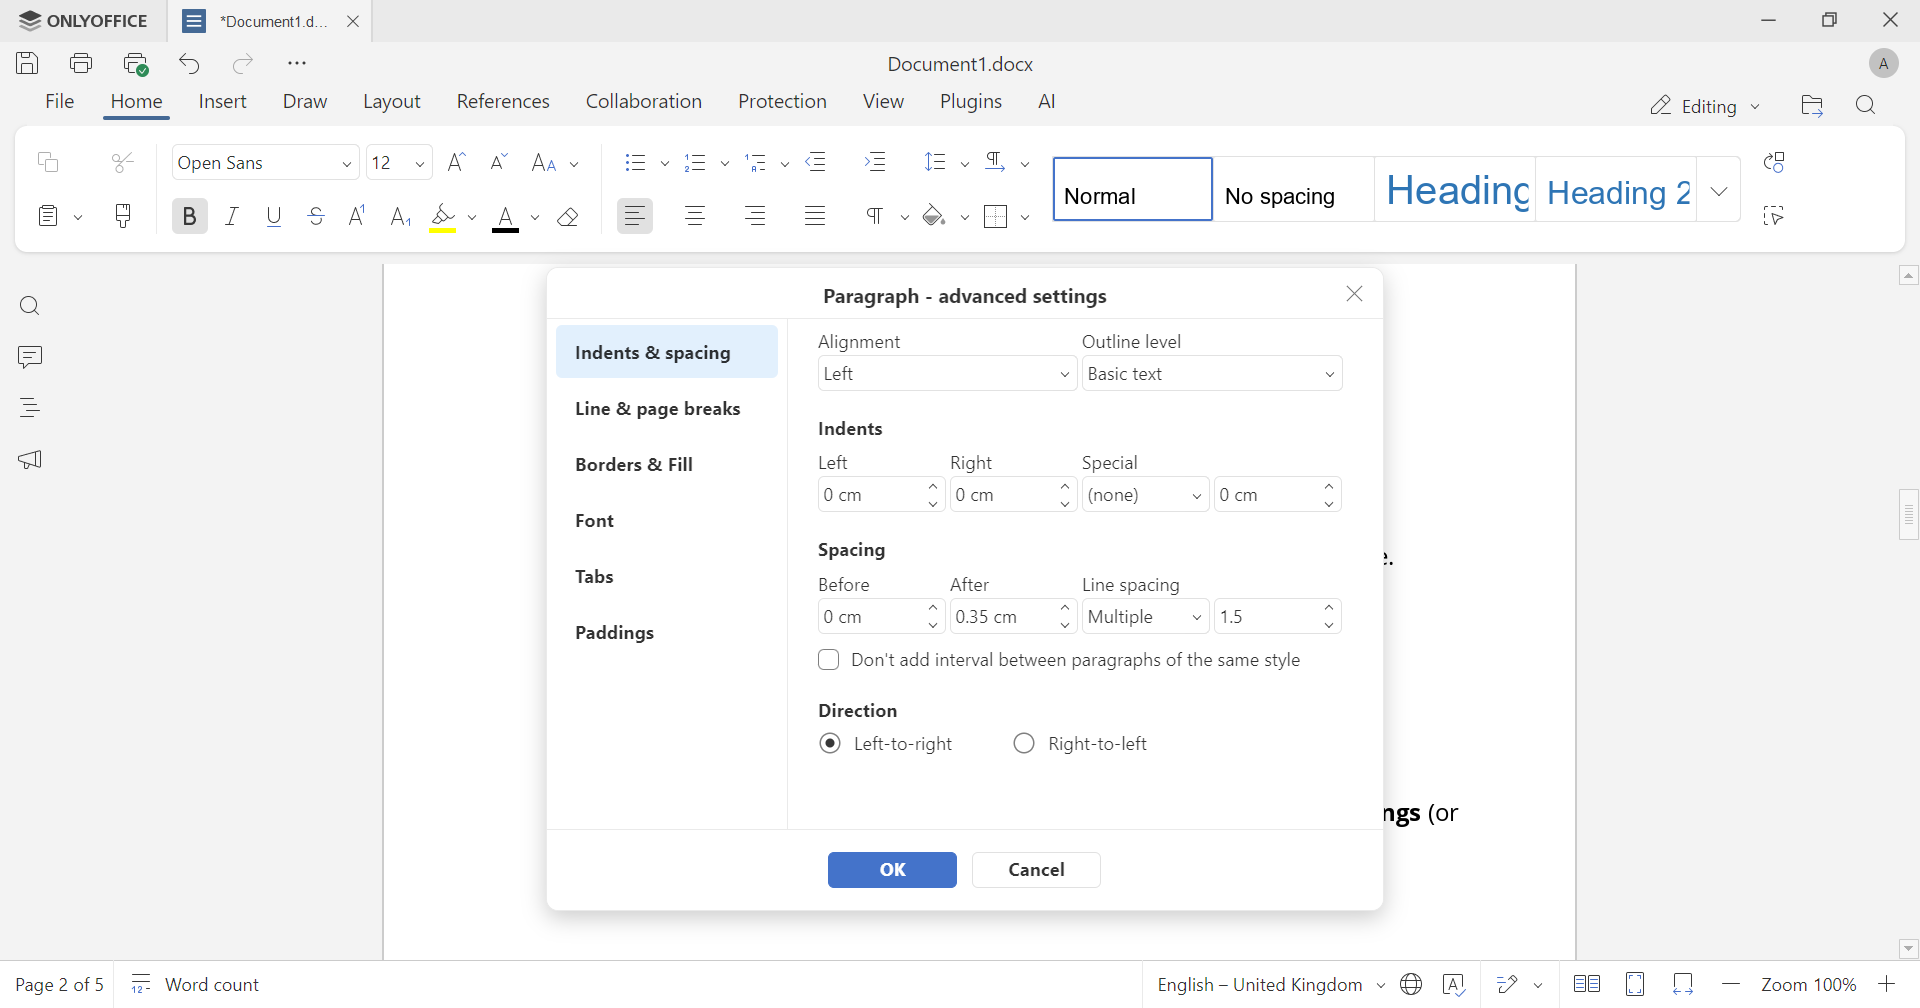
- Adjust the value in the entry field on the right if needed; the default is 1.27 cm (0.5 inch), which matches most academic citation styles.
- Click OK to apply.
Method 2: The ruler
Make sure rulers are visible first. They’re shown by default, but if they’ve been hidden, go to View → Rulers to bring them back.
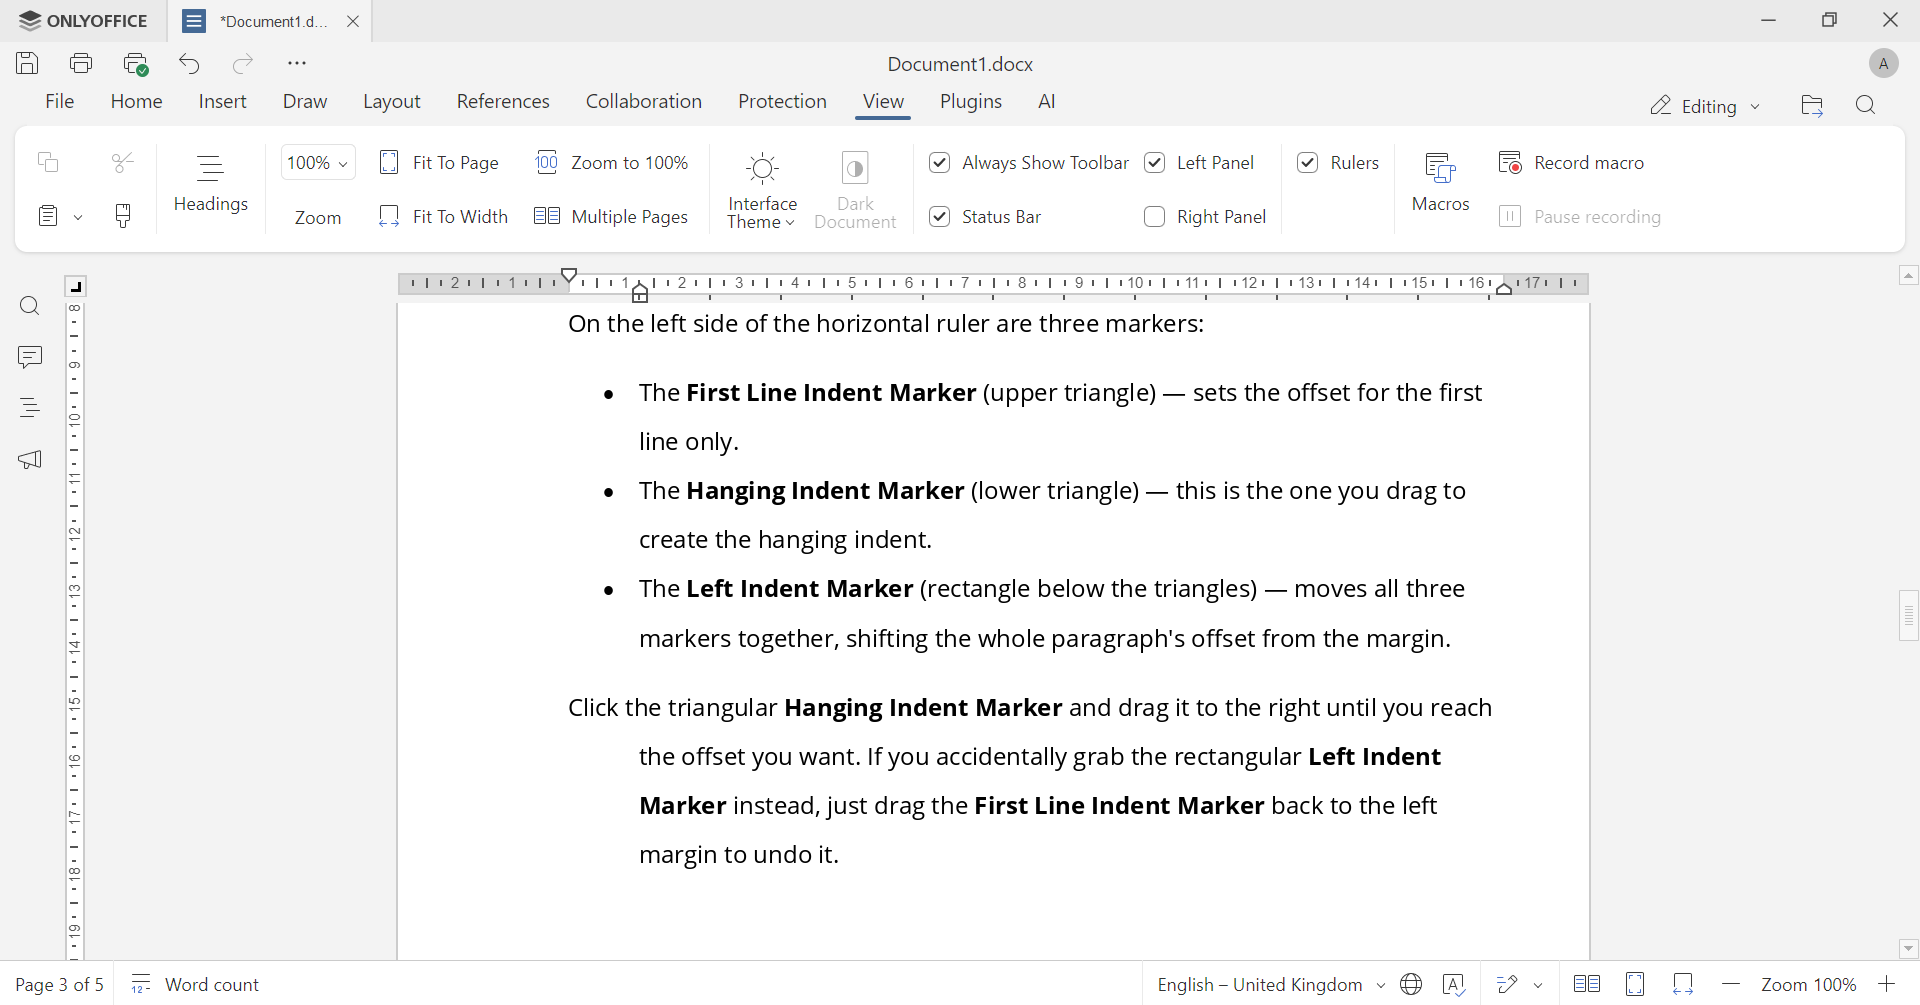
On the left side of the horizontal ruler are three markers:
- The First Line Indent Marker (upper triangle): sets the offset for the first line only.
- The Hanging Indent Marker (lower triangle): this is the one you drag to create the hanging indent.
- The Left Indent Marker (rectangle below the triangles): moves all three markers together, shifting the whole paragraph’s offset from the margin.
Click the triangular Hanging Indent Marker and drag it to the right until you reach the offset you want. If you accidentally grab the rectangular Left Indent Marker instead, just drag the First Line Indent Marker back to the left margin to undo it.
Hanging indents vs. first-line indents: Know the difference
| Format | First line | Following lines | Common use |
| First-line indent | Indented | Flush left | Standard prose paragraphs |
| Hanging indent | Flush left | Indented | Bibliographies, glossaries, legal citations |
Mixing the two up is a common formatting mistake — applying a first-line indent to a reference list, for instance, buries the author’s name in the middle of the line instead of anchoring it at the margin, which is exactly what citation styles are designed to avoid.
When to use a hanging indent
- Bibliographies and reference lists: APA, MLA, and Chicago style all require hanging indents for works-cited entries.
- Glossaries and definition lists: the term stays flush left while the definition wraps beneath it.
- Legal documents: numbered clauses and citations often use hanging indents so clause numbers stay visually distinct.
- Resumes: job titles or dates flush left, with responsibilities indented underneath.
- Poetry and scripts: occasionally used for stage directions or line continuations.
Practical considerations
A few practictal tips to keep your text nice and clean:
- Consistency matters: apply the hanging indent as a paragraph style rather than paragraph-by-paragraph if you’re formatting a long document; that way every entry stays uniform if you later adjust the value.
- Don’t use spaces or tabs: manually indenting with the spacebar or repeated Tab presses breaks as soon as the text rewraps or the font size changes. The paragraph-level setting is the only version that survives edits.
- Check your style guide: the standard indent value is 0.5 inch in most Western academic styles, but always confirm against the specific citation style you’re following.
- Works the same across formats: a hanging indent set in ONLYOFFICE Document Editor is preserved when the file is saved as .docx or .odt, so formatting won’t shift when the document moves between editors.
Get ONLYOFFICE and format with confidence
Give your texts a more professional look with ONLYOFFICE Document Editor and explore its many useful features.
Create your free ONLYOFFICE account
View, edit and collaborate on docs, sheets, slides, forms, and PDF files online.