How to import data from Salesforce objects and reports into ONLYOFFICE spreadsheets
Summary
To import data from Salesforce objects and reports into ONLYOFFICE spreadsheets, you can utilize the Salesforce plugin. This plugin allows you to directly connect to Salesforce, enabling you to import existing reports or raw data from standard and custom objects, analyze it, and then export updates back to Salesforce.
- Install and configure the plugin.
- Import reports with filters and groupings from Salesforce.
- Pull data from standard or custom Salesforce objects.
- Export cleaned data back to Salesforce easily.
Working with CRM data often means switching between multiple apps: exporting Salesforce records, cleaning them up in a spreadsheet, analyzing the results, and getting updates back into Salesforce. This cycle eats up time and focus.
The Salesforce plugin helps eliminate this repetitive and routine task. It brings your data into spreadsheets, so you can edit, analyze, and export data. In this guide, discover how it works and how to get started.

About the Salesforce plugin
The new Salesforce plugin lets you connect your organization and work with Salesforce data directly in Spreadsheet Editor.
With the plugin, you can:
- Import existing Salesforce reports, complete with their filters and groupings.
- Pull data from standard and custom Salesforce objects.
- Analyze, organize, and edit imported data using the familiar spreadsheet tools.
- Export new records or update existing ones back to Salesforce.
Please note: The plugin is compatible with self-hosted versions of the ONLYOFFICE editors.
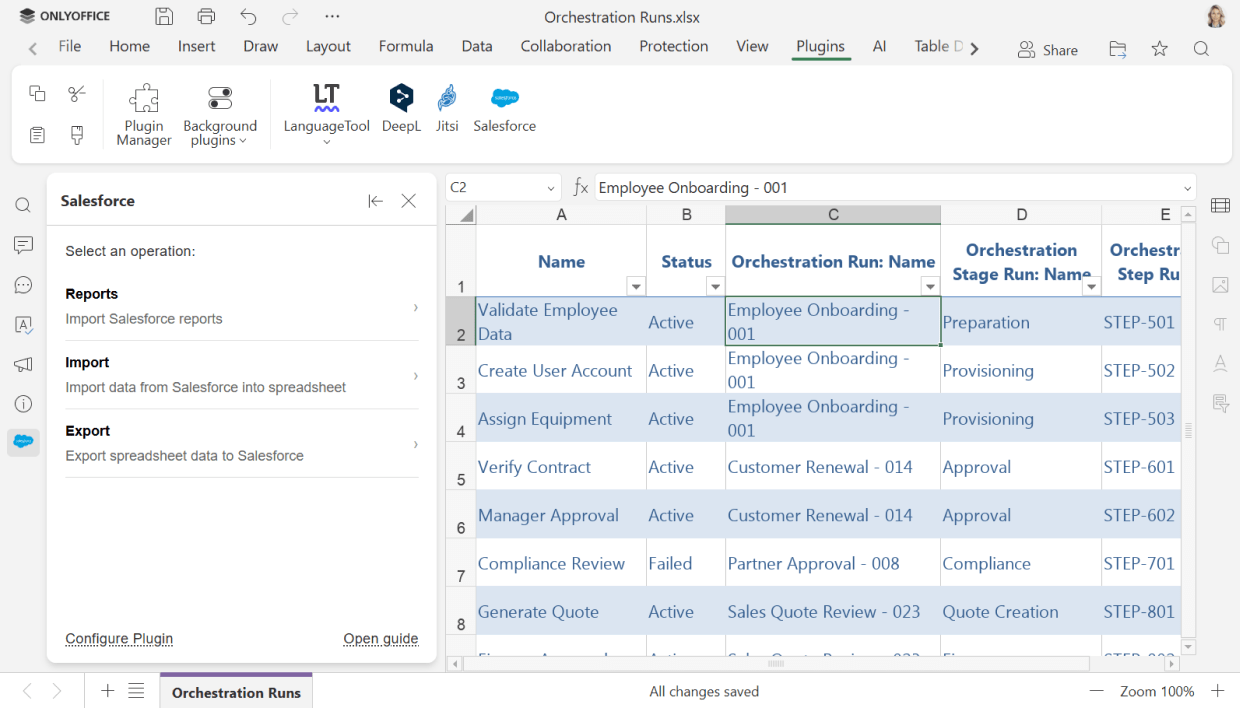
How to import reports from Salesforce
If you already rely on Salesforce reports to track your pipeline, the plugin can pull in the same result set, including filters and groupings.
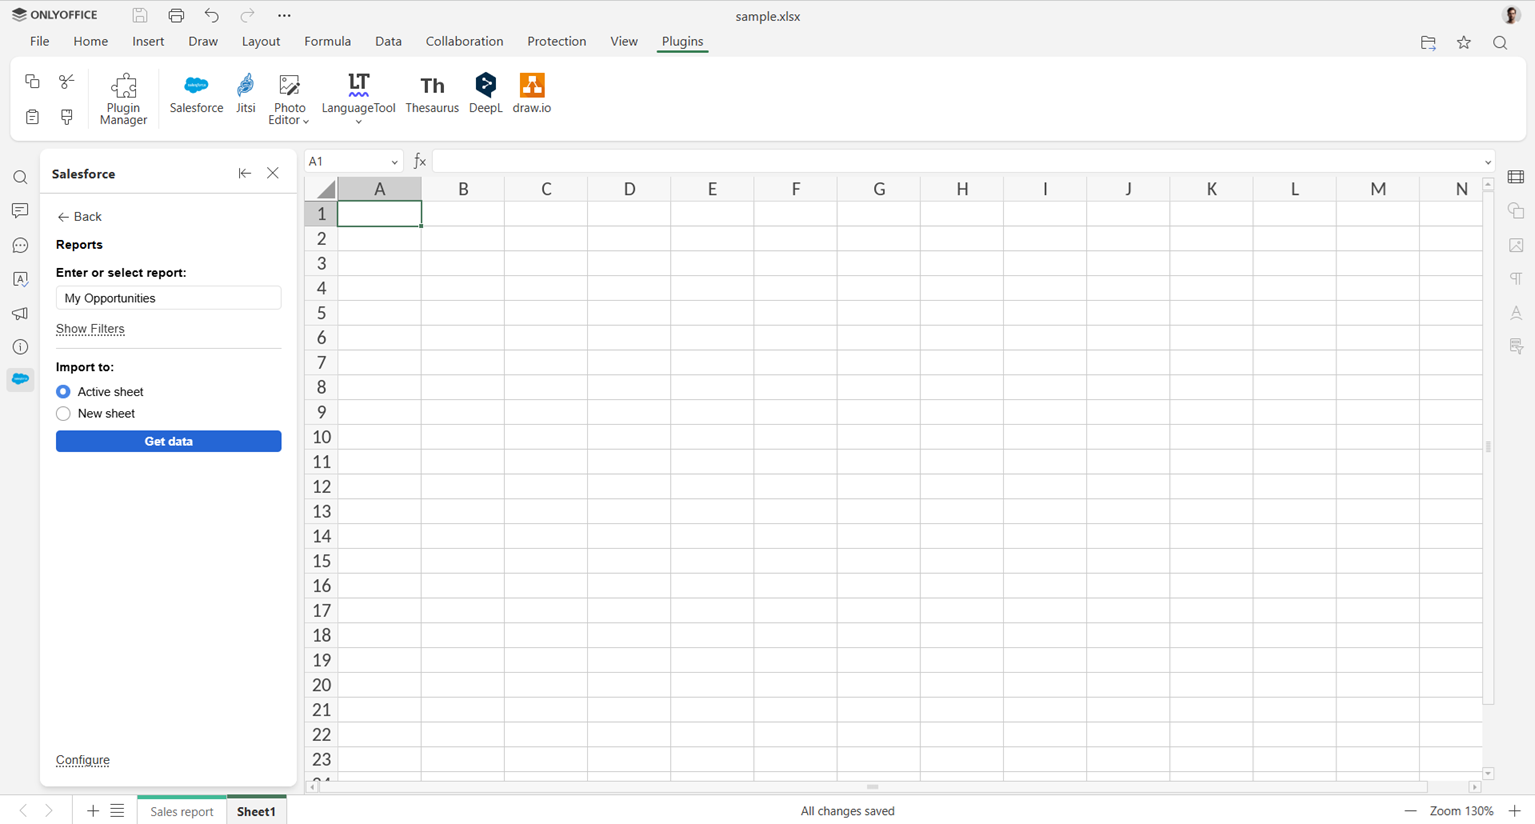
1. Open the Salesforce plugin and select Reports.
2. Choose a report from the drop-down list. Use filters to find the right one if needed.
3. Check where you want to import the report: into an active sheet or a new sheet.
4. Click Get data to pull the report’s result set into your spreadsheet.
Your report data appears in the sheet, ready for further work.
How to import data from Salesforce objects
Sometimes a saved report doesn’t quite match what you need, and you’d rather pull raw records straight from an object.
1. Select Import in the plugin panel.
2. Choose a standard or custom object from the list (Accounts, Opportunities, etc.), or switch to query mode and write your own SOQL statement for more specific results.
3. Select the fields you actually need.
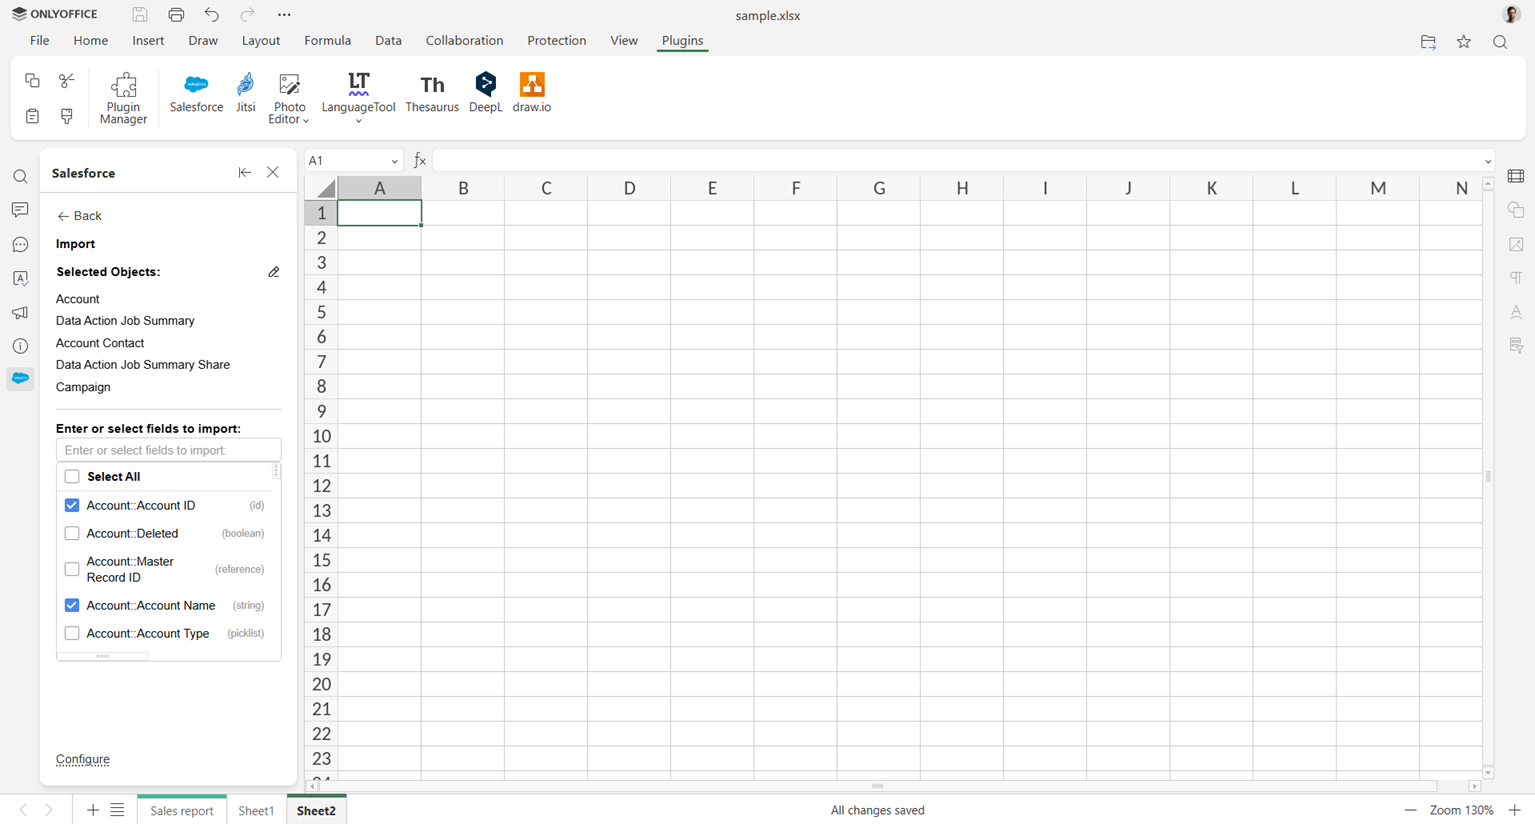
4. Narrow down the results with filter conditions (by owner, status, date range, or any other field), and set a limit on the number of records for large objects.
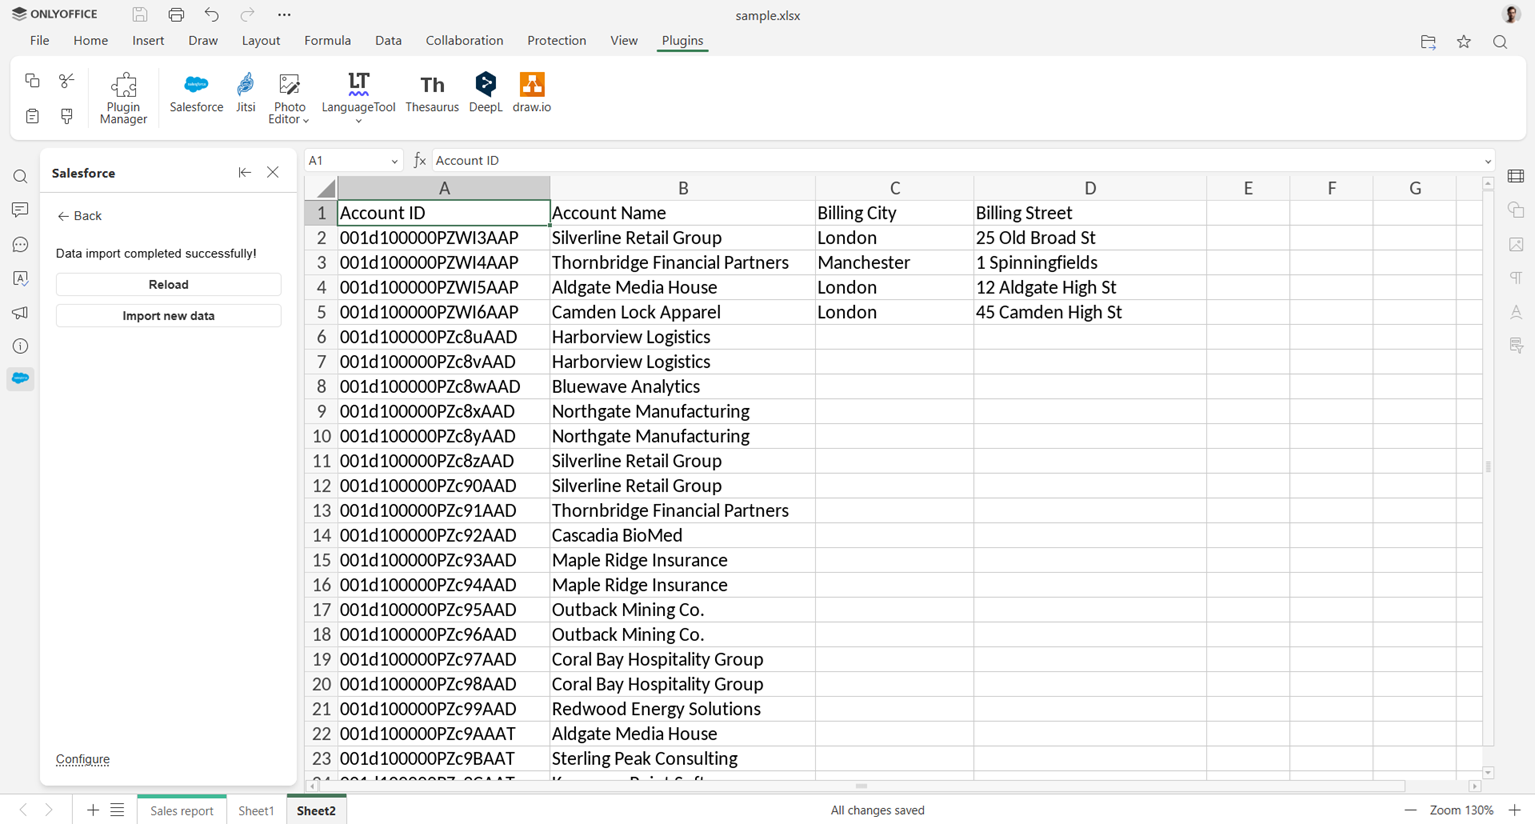
5. Click Import. The result set is pasted starting from the selected cell.
How to export records back to Salesforce
Once you’ve cleaned up, recalculated, or annotated your data in the spreadsheet, sending it back to Salesforce is straightforward.
1. Click Export.
2. Choose the range of cells you want to export (include the header row) and click Load Data.
3. Select the Salesforce object you want to send your data to and click Next.
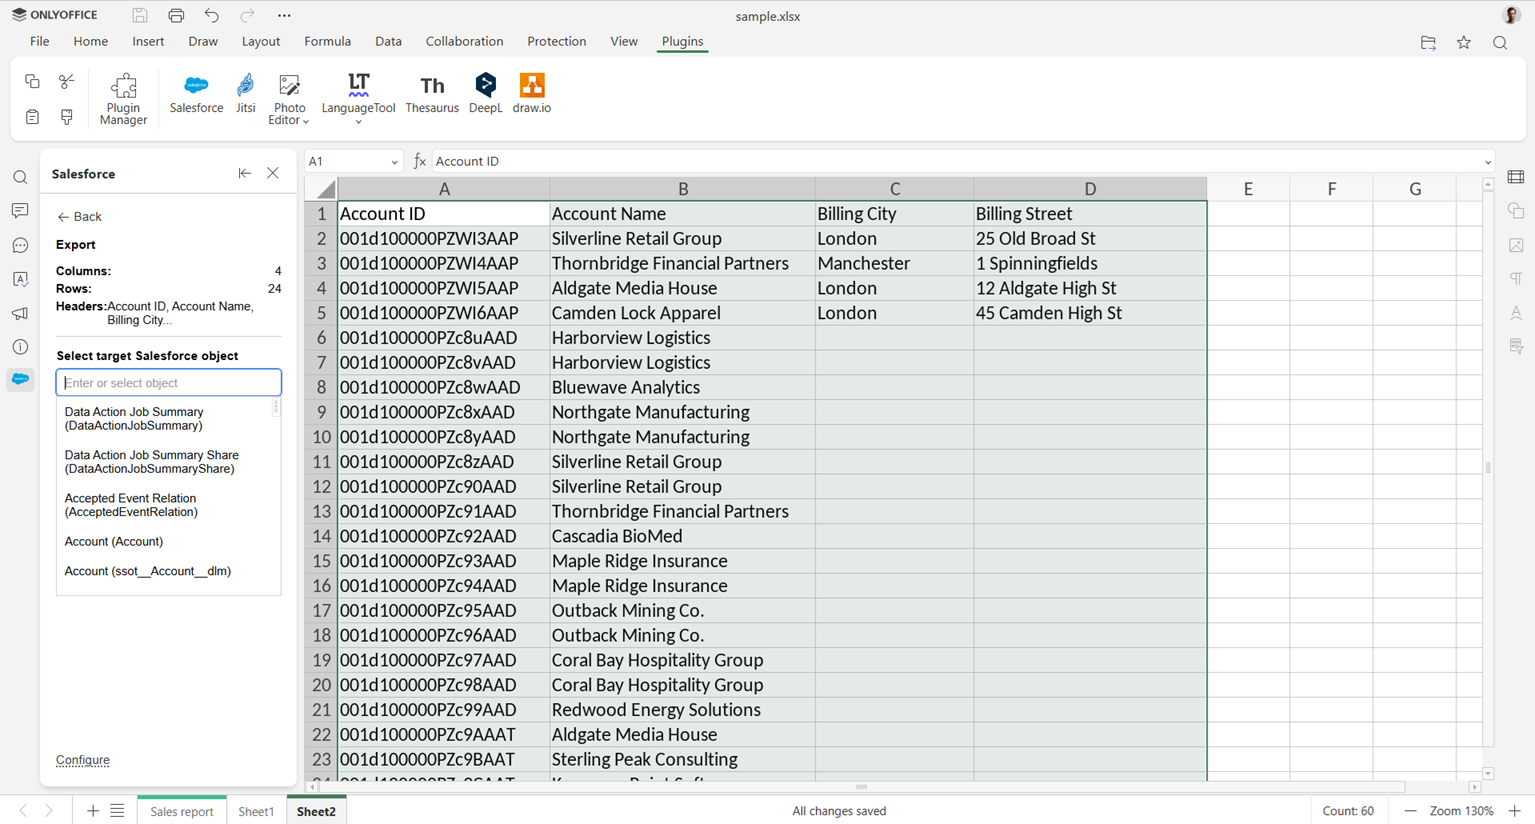
4. Map each spreadsheet column to the corresponding object field. Unmapped columns will not be sent.
5. Confirm the export. New records are created in Salesforce for the exported rows.
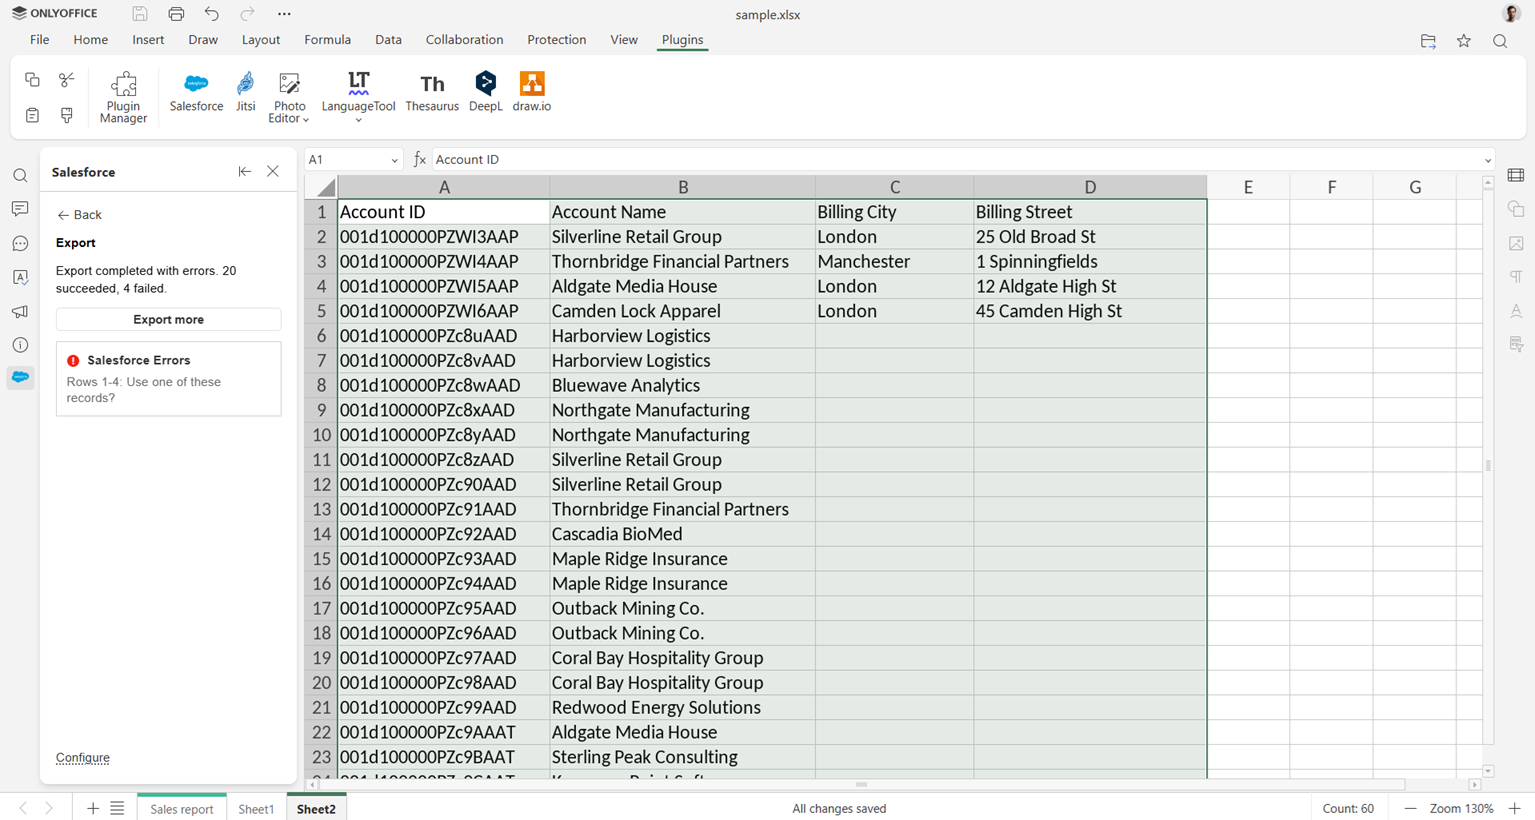
Once the export finishes, you’ll see the result and any errors if something goes wrong.
How to install and configure the integration
Before using the plugin, an administrator must create a Connected App in Salesforce and get a Client ID.
Create a Salesforce External App
1. In Salesforce, navigate to Setup → Platform Tools → Apps → External Client Apps → External Client App Manager and click New External Client App. 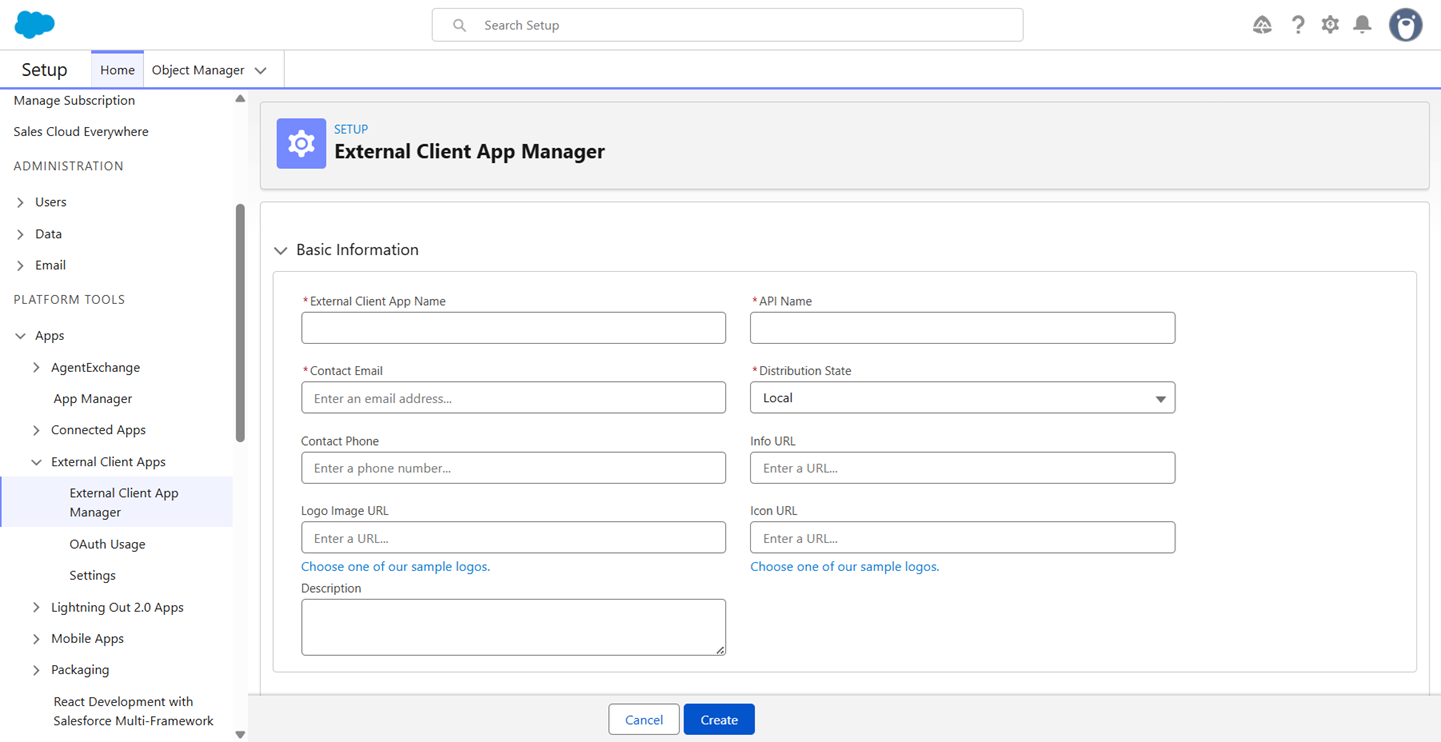
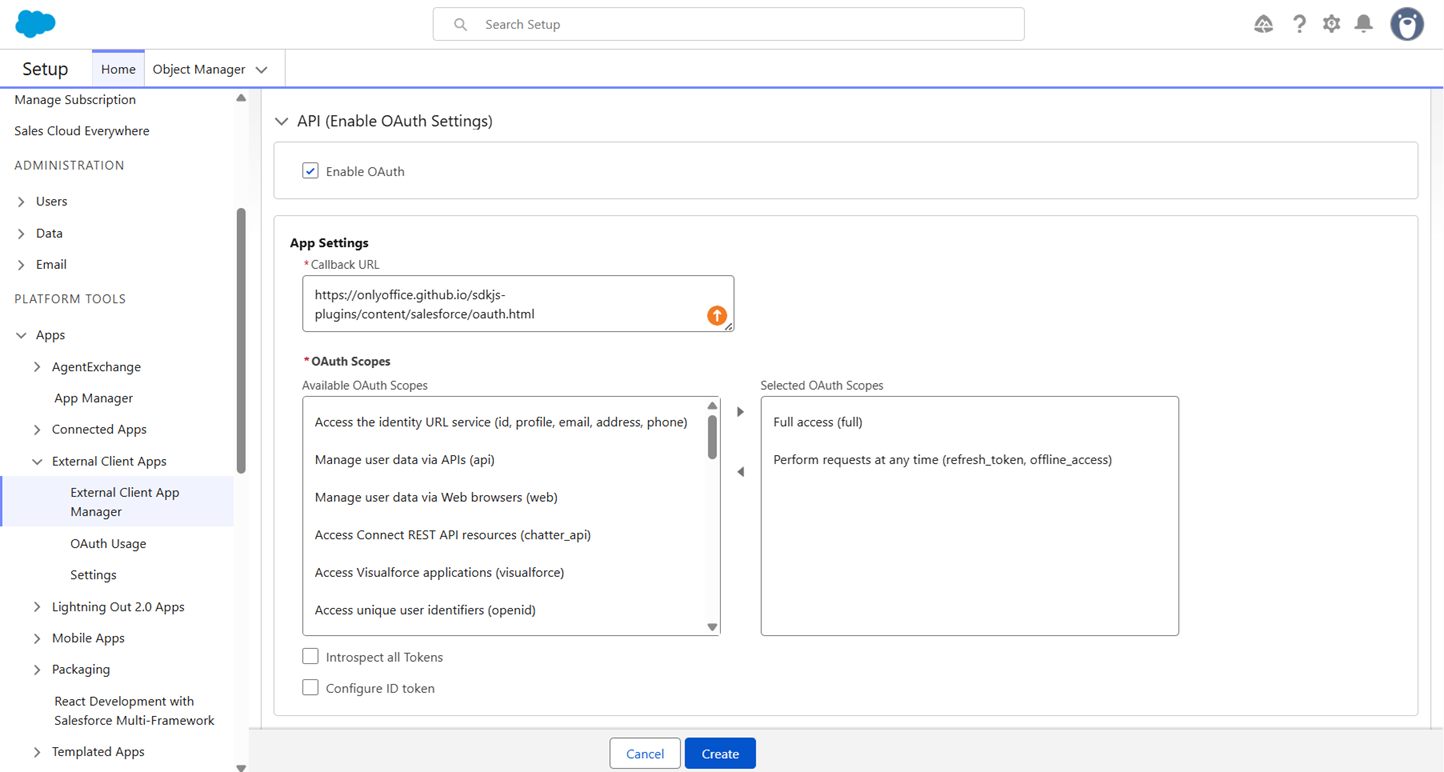
2. Fill in the basic app info, then enable OAuth Settings.Below, set the Callback URL to https://onlyoffice.github.io/sdkjs-plugins/content/salesforce/oauth.html.
3. Add the following to Selected OAuth Scopes:
- Full access (full)
- Perform requests at any time (refresh_token, offline_access)
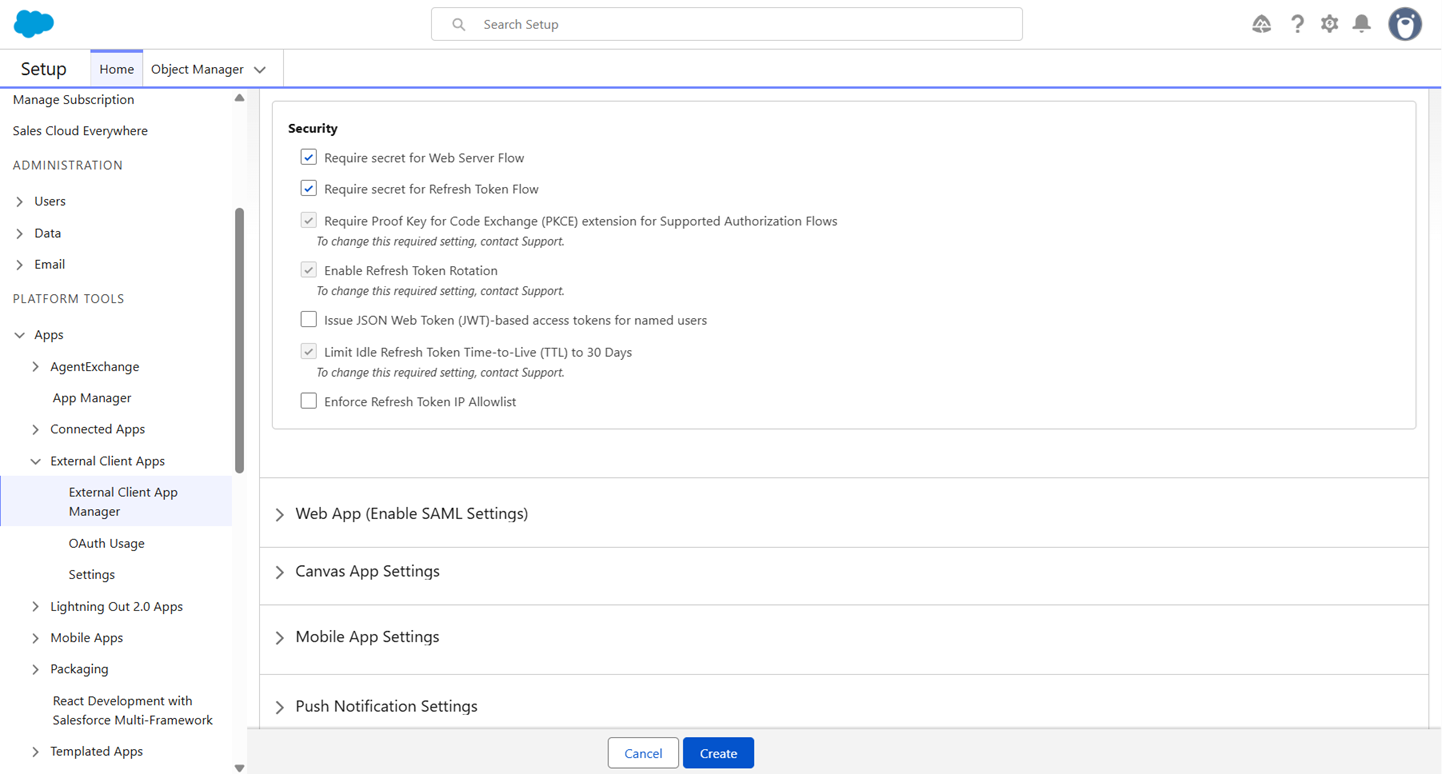
4. Under Security, enable:
- Require secret for Web Server Flow
- Require secret for Refresh Token Flow.
Click Create.
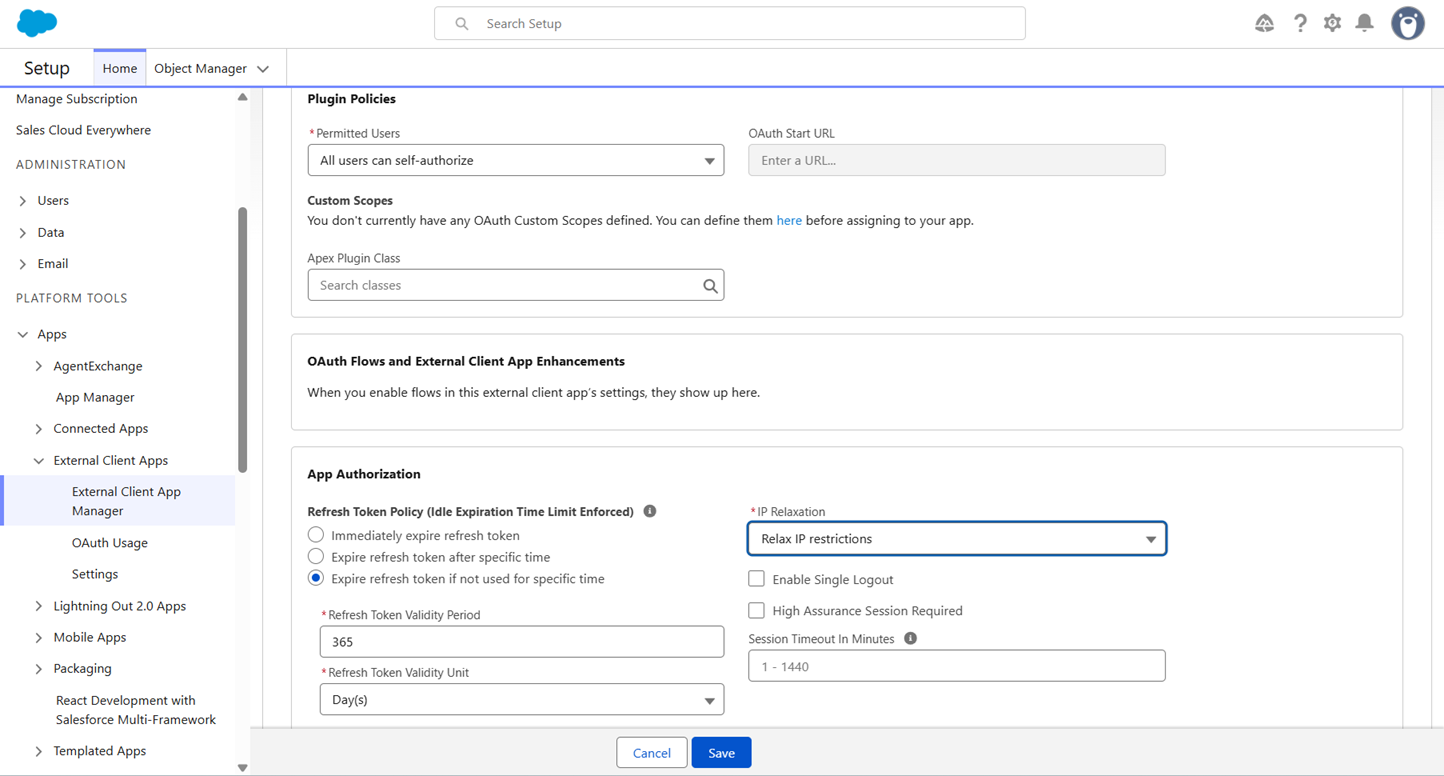
5. Set OAuth Policies to All users can self-authorize, with refresh tokens expiring after 365 days, and relax IP restrictions.
6. Save the app, open OAuth Settings and copy the Consumer Key – this is your Client ID.
7. Go to Setup → Security → CORS, add a new entry with the origin URL pattern https://onlyoffice.github.io and save.
Install the plugin in ONLYOFFICE
The Salesforce plugin can be installed directly from ONLYOFFICE.
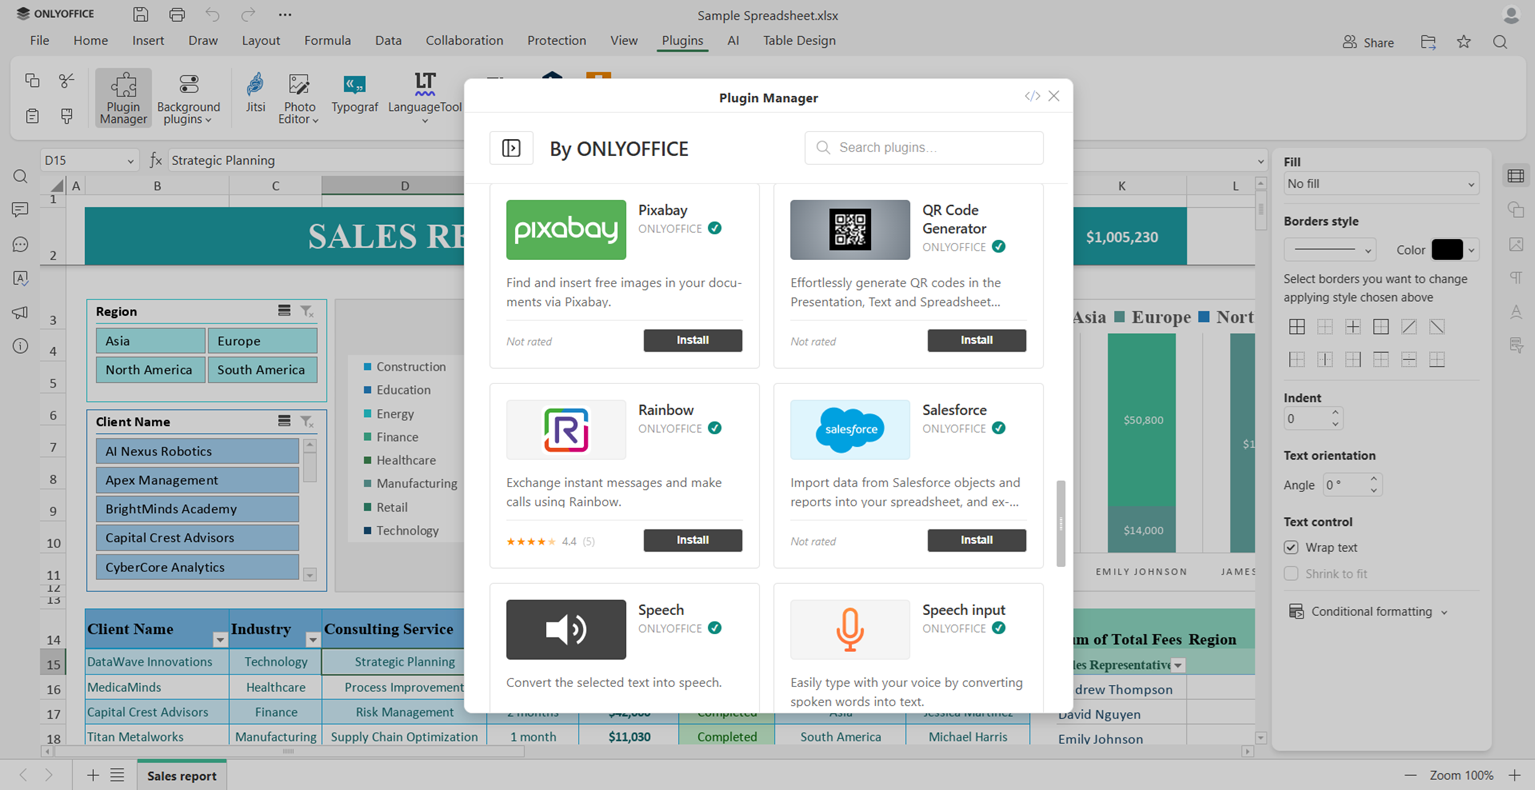
1. Open ONLYOFFICE Spreadsheet Editor and navigate to the Plugins tab.
2. Click the Plugin Manager icon.
3. Search for Salesforce in the list of available plugins and click Install next to the plugin’s icon.
The plugin will appear in the Plugins tab.
Configure the integration
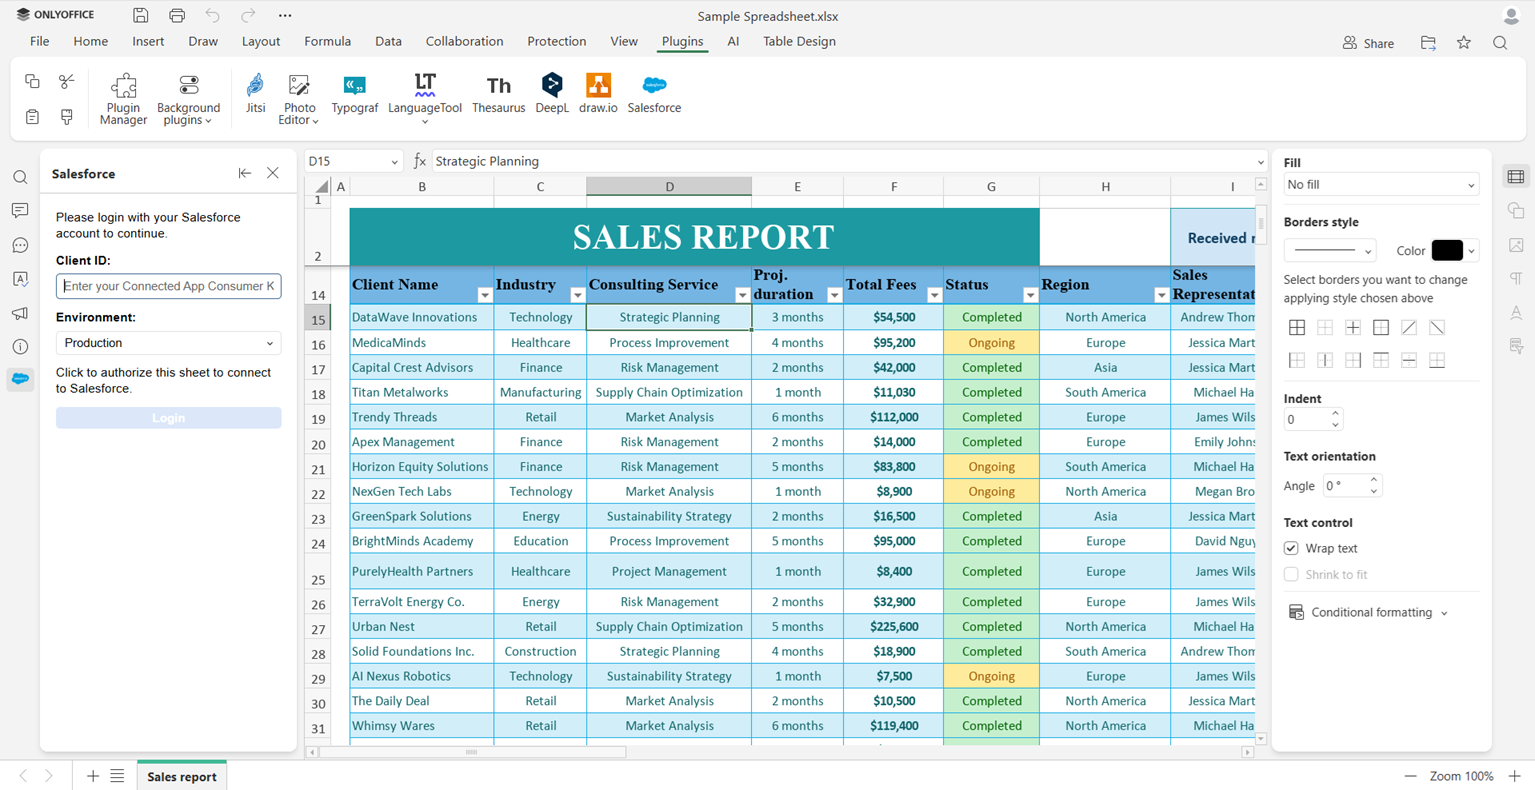
1. Open the Salesforce plugin by clicking the icon.
2. In the left-side toolbar, enter the Client ID and choose the environment: Production or Sandbox.
3. Click Log in and authorize with your Salesforce account.
Once connected, you’re ready to import and export data.
Import your Salesforce data into ONLYOFFICE Spreadsheet Editor
Import data, bring existing reports into your worksheet, and make the necessary changes right from ONLYOFFICE Spreadsheet Editor.
Try the new plugin in your self-hosted instance:
Create your free ONLYOFFICE account
View, edit and collaborate on docs, sheets, slides, forms, and PDF files online.