How to write an ONLYOFFICE plugin with AI: the OData Import plugin case
Want to know how AI can easily develop plugins for ONLYOFFICE? In this blog post, we will tell you how to create a plugin using AI, based on the example of OData Import, a new spreadsheet tool fully developed by artificial intelligence.

About the plugin
OData Import is a plugin developed for ONLYOFFICE Spreadsheet Editor to simplify data workflows. It allows you to easily import data from OData feeds into your spreadsheets. Using the plugin, you simply enter an OData service URL, choose the required tables and paste data directly into the selected cells.
The plugin was completely developed by AI, and no line of code was written manually. All found bugs were also fixed by AI, which provides proof that artificial intelligence can create useful tools under human supervision.
Interesting fact: OData Import is not the first plugin created by AI. The first one was the Bergamot plugin that brought neural machine translation (NMT) to the ONLYOFFICE editors.
How we created the plugin using AI
Now, let’s go through the process of creating the OData Import plugin using AI. Below you will find a detailed description of all important steps and requirements.
Step 1. Getting started
Here is what we used to create the OData Import plugin:
- Operating system: macOS
- Code editor: Visual Studio Code
- AI tool: Claude AI
- AI extension: Claude Code for VS Code
We used ONLYOFFICE Desktop Editors for testing purposes and opened its directory where the desktop plugins are located directly in Visual Studio Code. This can be done in two ways:
- Using `$HOME`:
$HOME/Library/Application Support/asc.onlyoffice.ONLYOFFICE/data/sdkjs-plugins/
- Using `~` (tilde expansion):
~/Library/Application Support/asc.onlyoffice.ONLYOFFICE/data/sdkjs-plugins/
Step 2. Writing a prompt to get the AI to write code
When the developer environment was configured, we used the following prompt to make Claude AI write code for our plugin:
Write a new onlyoffice plugin See {1B6B4FBC-BFFA-4B01-A901-94996D88D1DC} for example. Plugin must do: work with OData like Excel see https://learn.microsoft.com/en-us/sharepoint/administration/create-an-excel-services-dashboard-using-an-odata-data-feed for example. It will have input for URL. Parse OData from link. Select Tables, and paste in spreadsheet onlyoffice editor
{1B6B4FBC-BFFA-4B01-A901-94996D88D1DC} is the GUID (Globally Unique Identifier) of one of the already existing ONLYOFFICE plugins.
After analysing the prompt, Claude AI started the development process by exploring the plugin structure.

Then the AI checked the ONLYOFFICE plugin documentation and created the plugin directory structure.
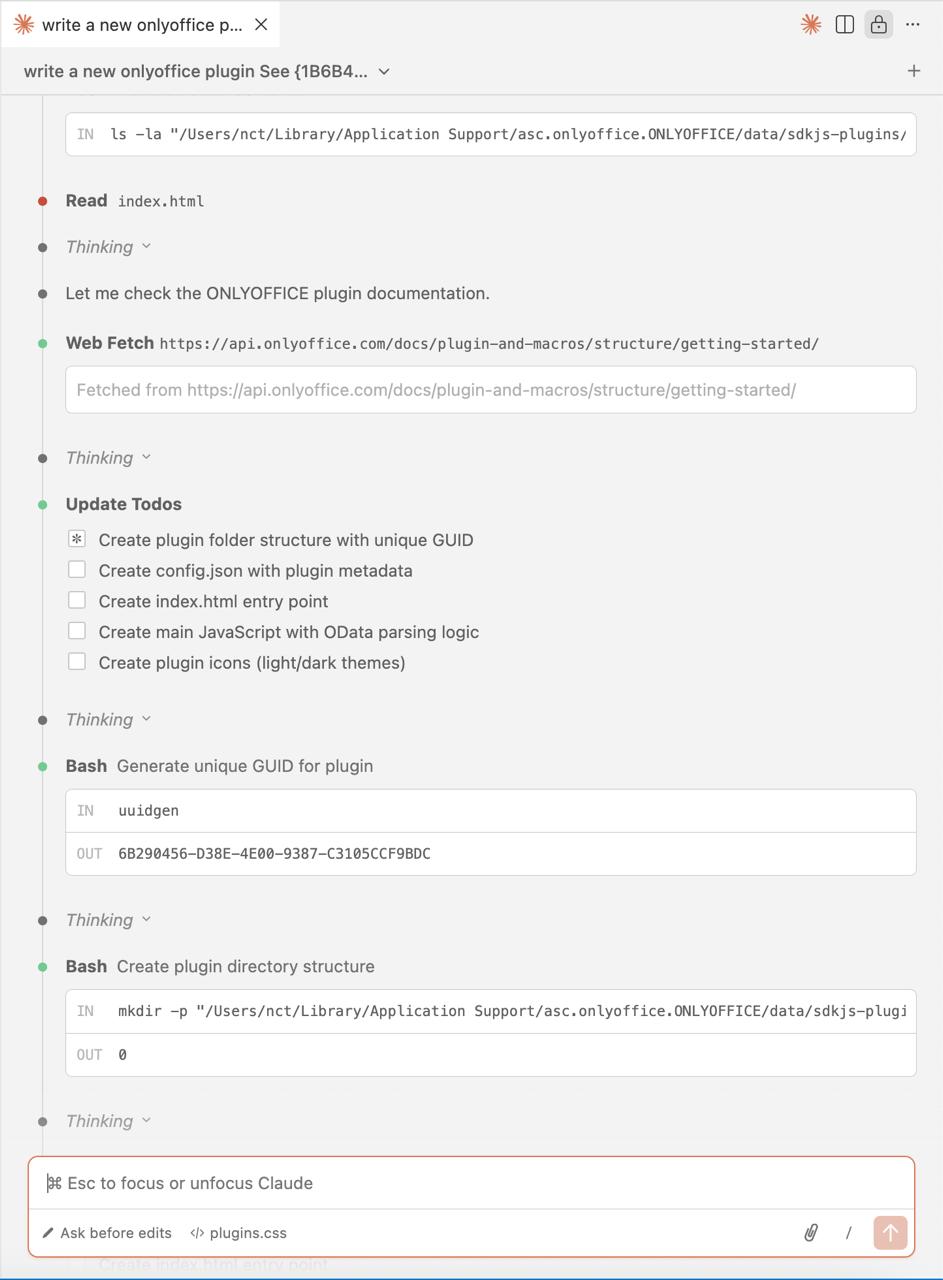
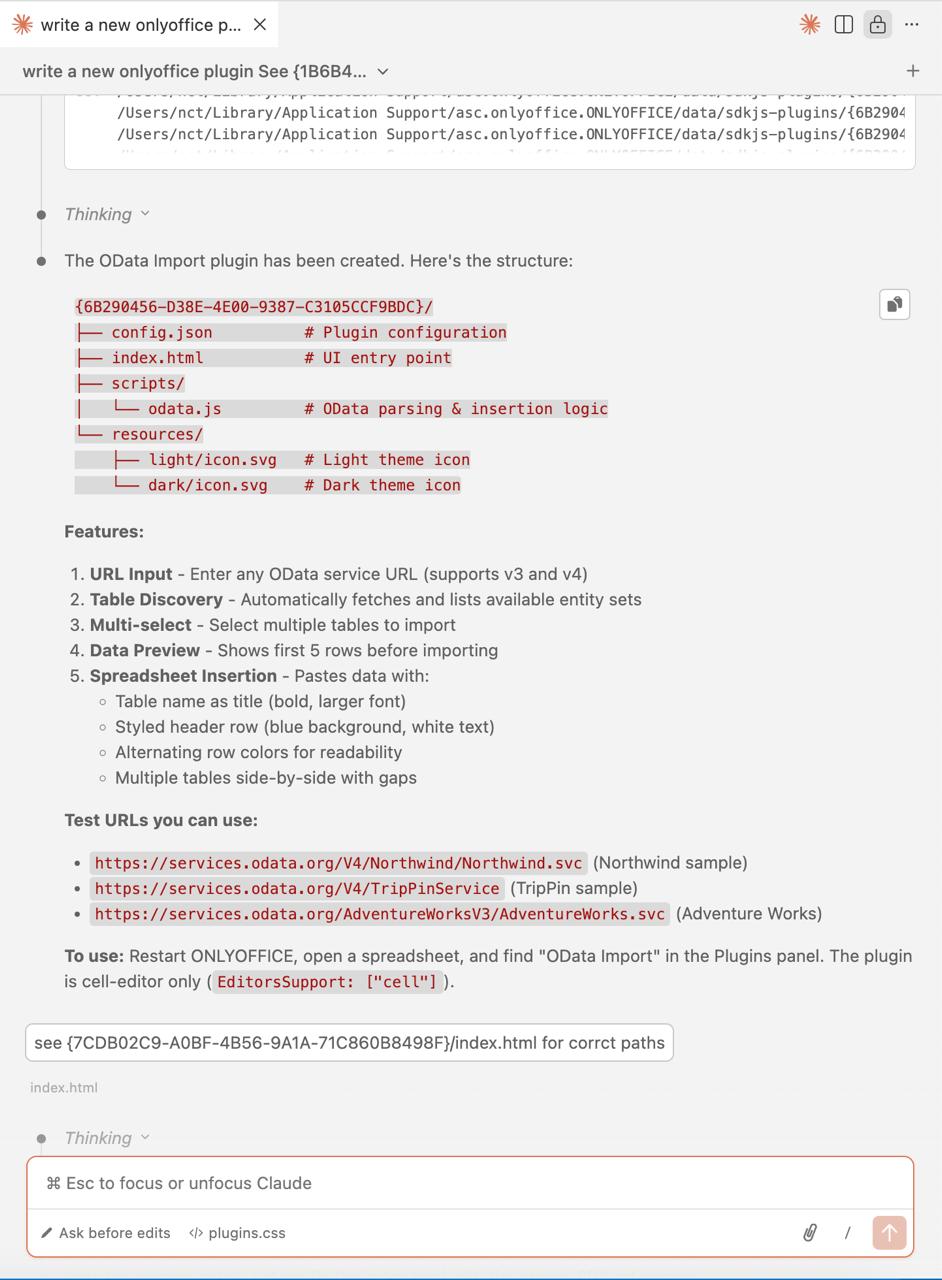
Finally, Claude AI created the plugin and provided some URLs for testing purposes.
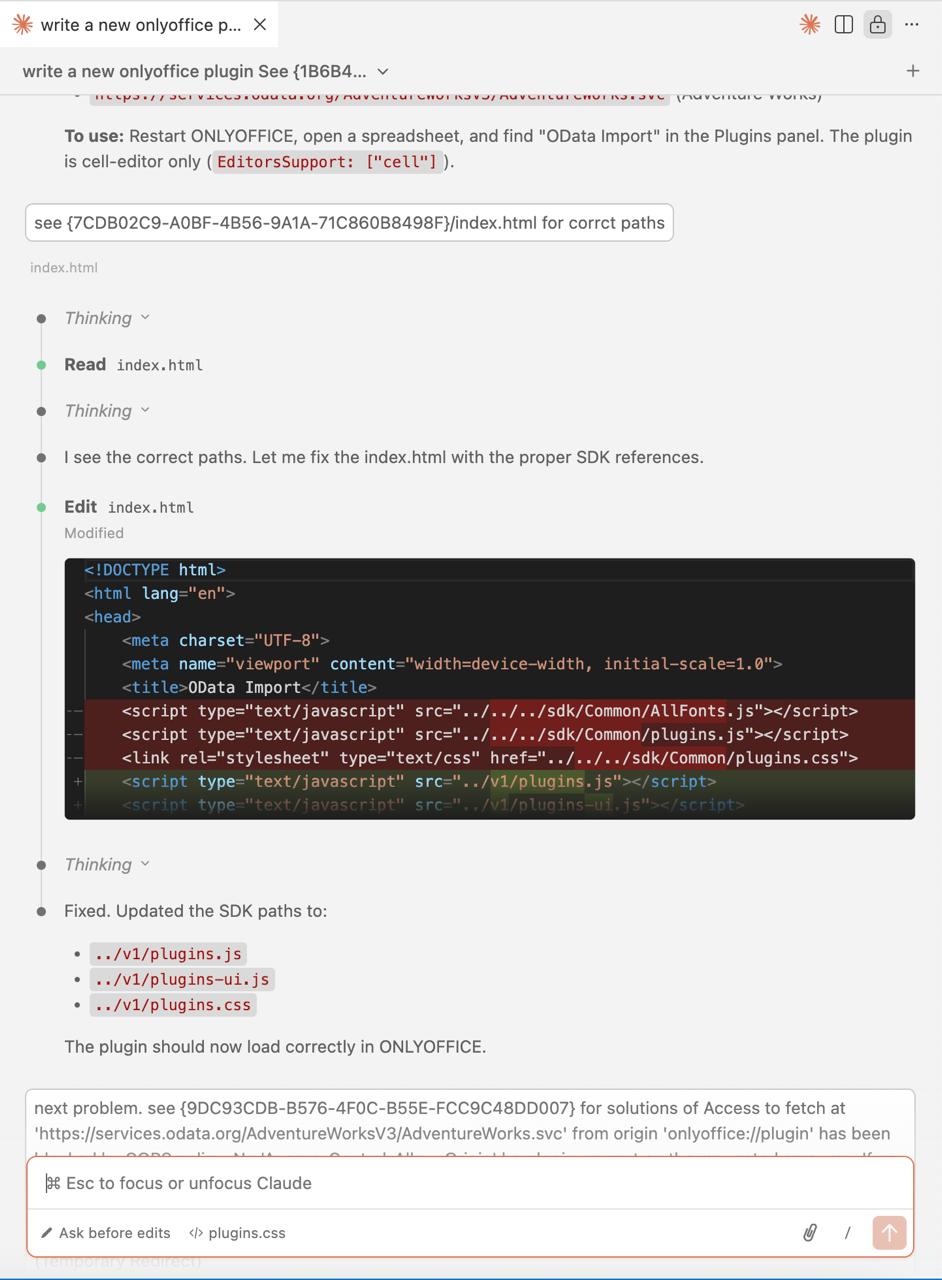
Step 3. Fixing errors with new prompts
When the plugin code was ready, we used new prompts to fix some problems we found. For example, we asked Claude AI to correct the wrong paths. The problem was that the paths were adapted for plugin publication and not for use in ONLYOFFICE Desktop Editors after installation.
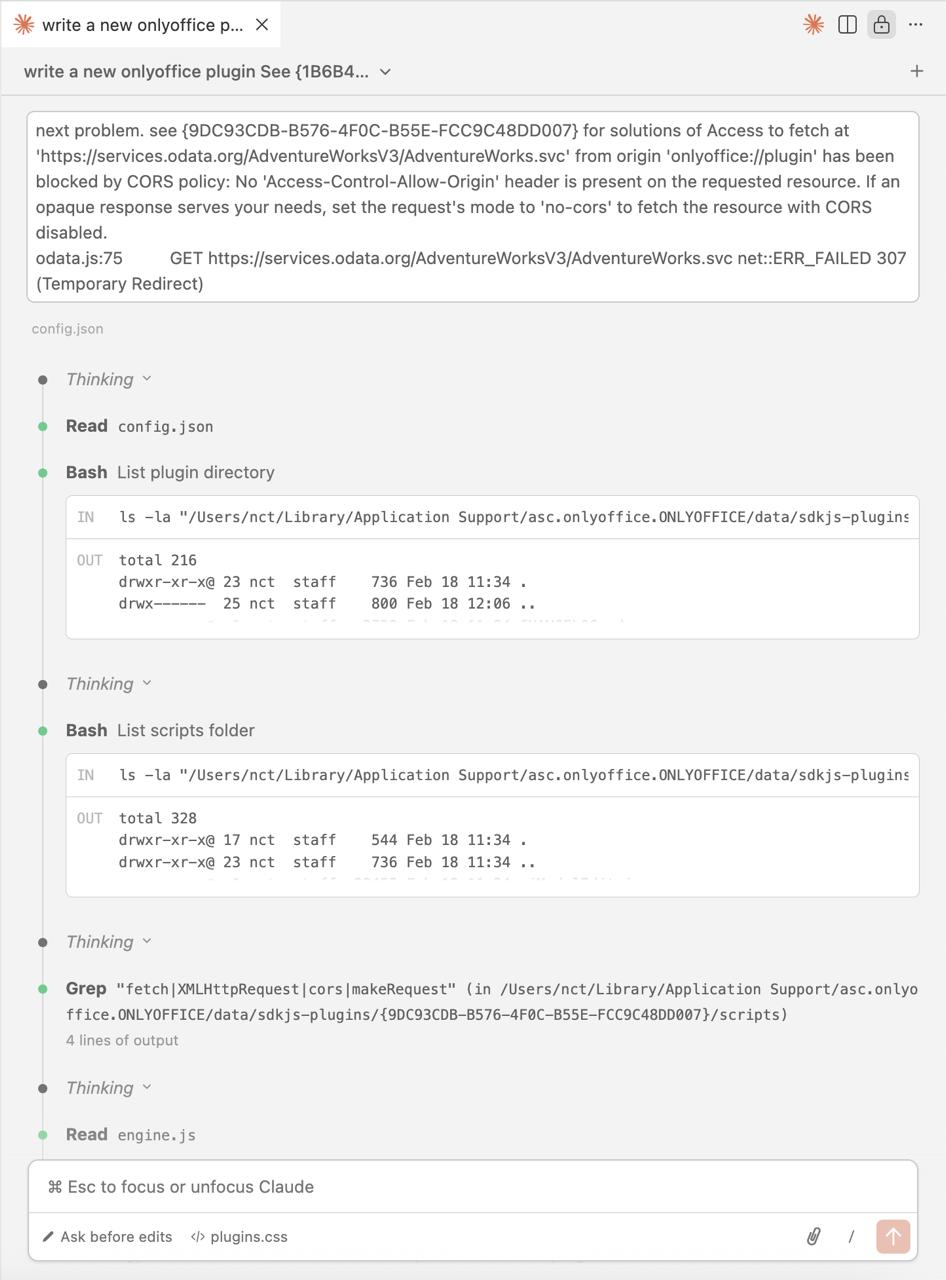
Another problem was related to Cross-Origin Resource Sharing (CORS). We fixed it with the following prompt:
next problem. see {9DC93CDB-B576-4F0C-B55E-FCC9C48DD007} for solutions of Access to fetch at ‘https://services.odata.org/AdventureWorksV3/AdventureWorks.svc’ from origin ‘onlyoffice://plugin’ has been blocked by CORS policy: No ‘Access-Control-Allow-Origin’ header is present on the requested resource. If an opaque response serves your needs, set the request’s mode to ‘no-cors’ to fetch the resource with CORS disabled
odata.js:75 GET https://services.odata.org/AdventureWorksV3/AdventureWorks.svc net::ERR_FAILED 307 (Temporary Redirect)
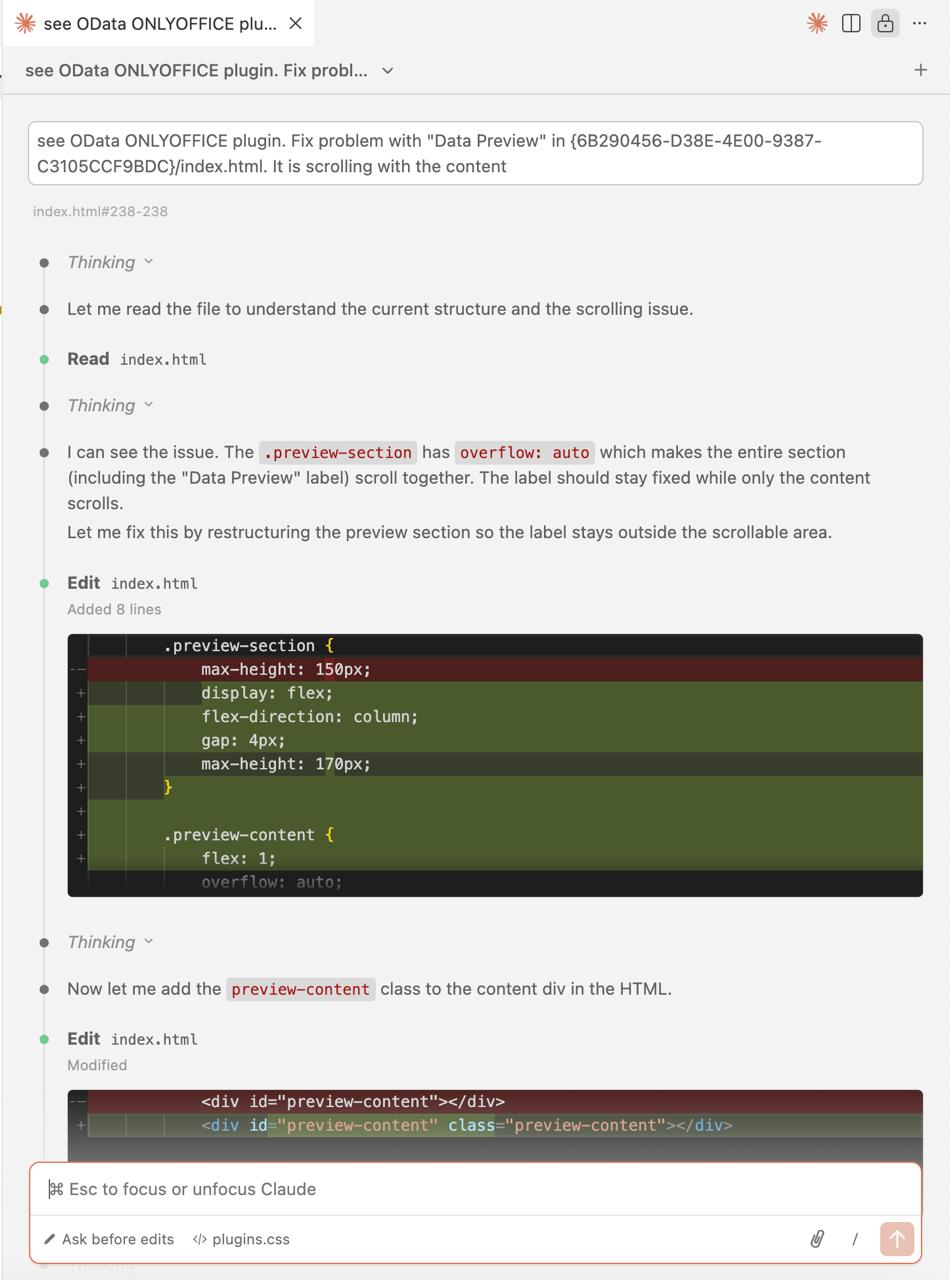
After that, we created a new chat and kept fixing errors. For example, we solved the Data Preview problem.
Step 4. Adjusting the plugin code
After fixing the critical errors, we used some new prompts to adjust the plugin functionality.
For example, we asked Claude AI to add a button for data insertion. As a reference example, we used the Bergamot plugin.
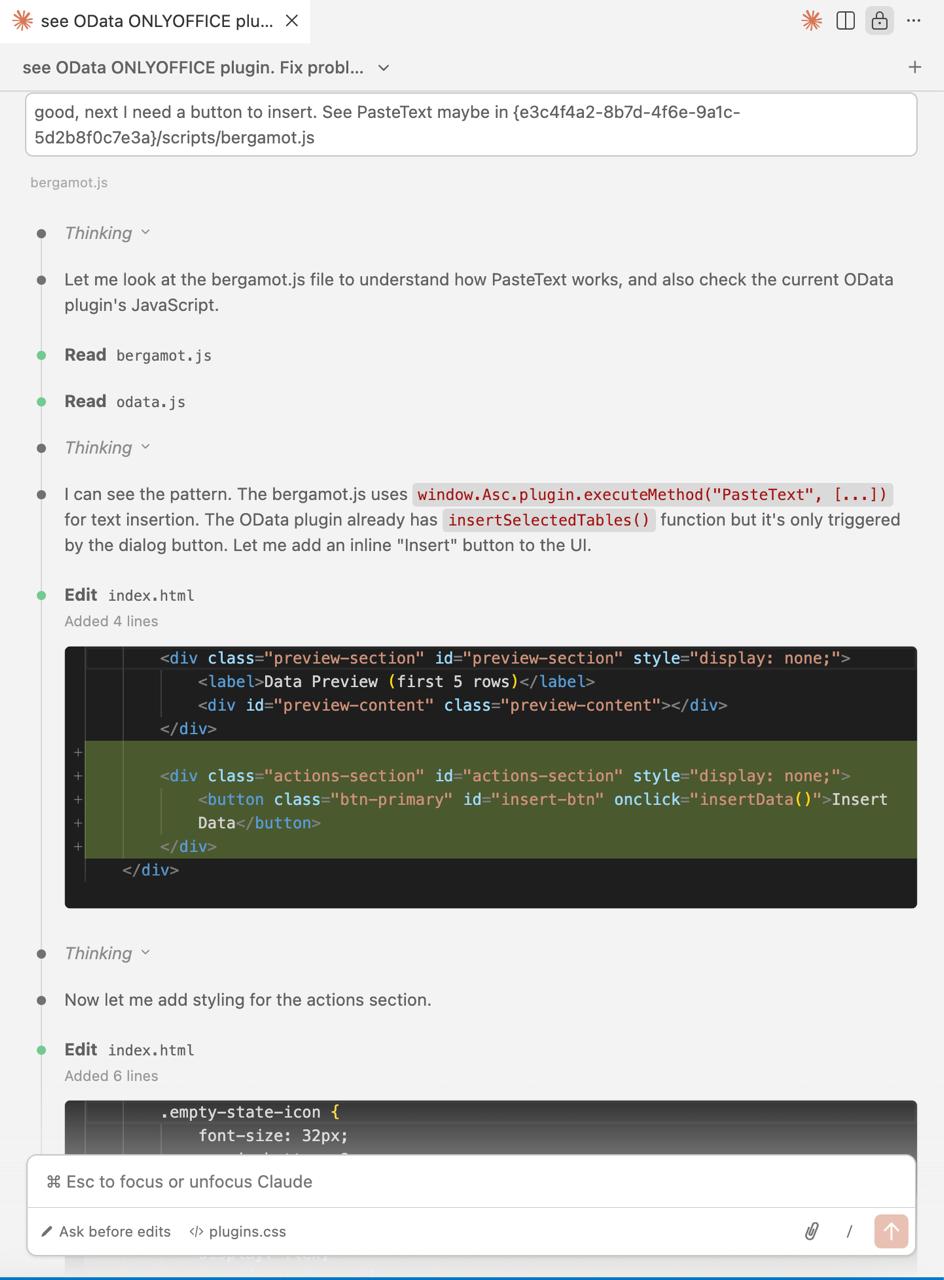
This way, we fixed a lot of things, such as table sorting, one item selection, showing 10 rows instead of 5 and more.

Step 5 (final). Testing the plugin and fixing bugs
When the plugin was ready, our Q&A team manually tested it. All found bugs were fixed with Claude AI, following the pattern described above.
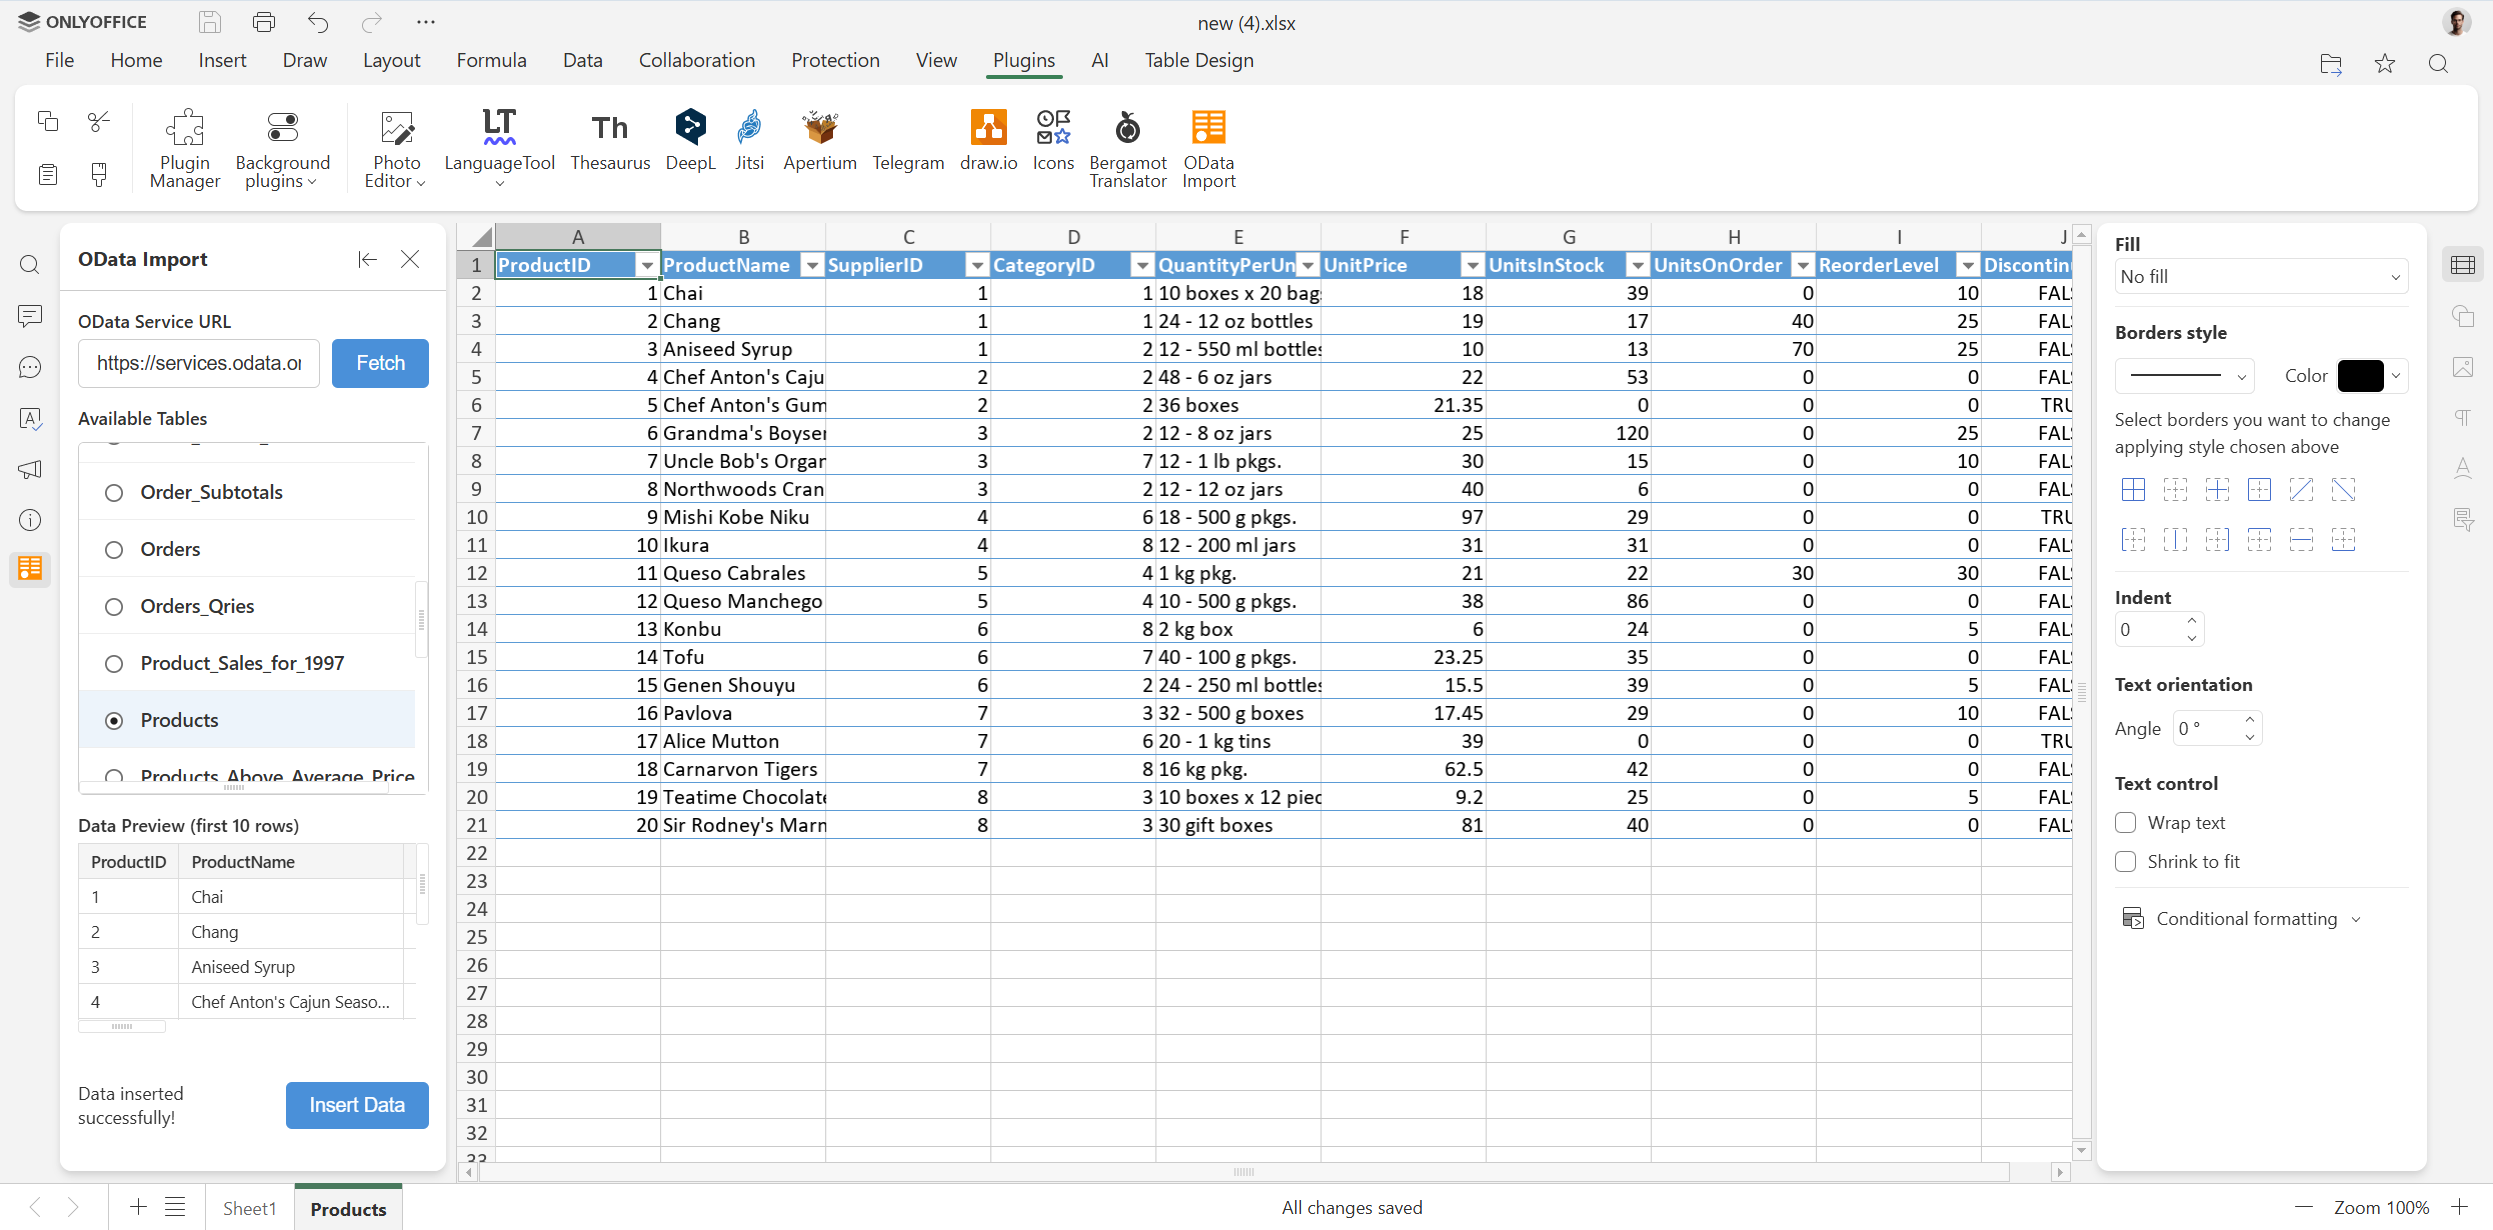
How to install and use the plugin
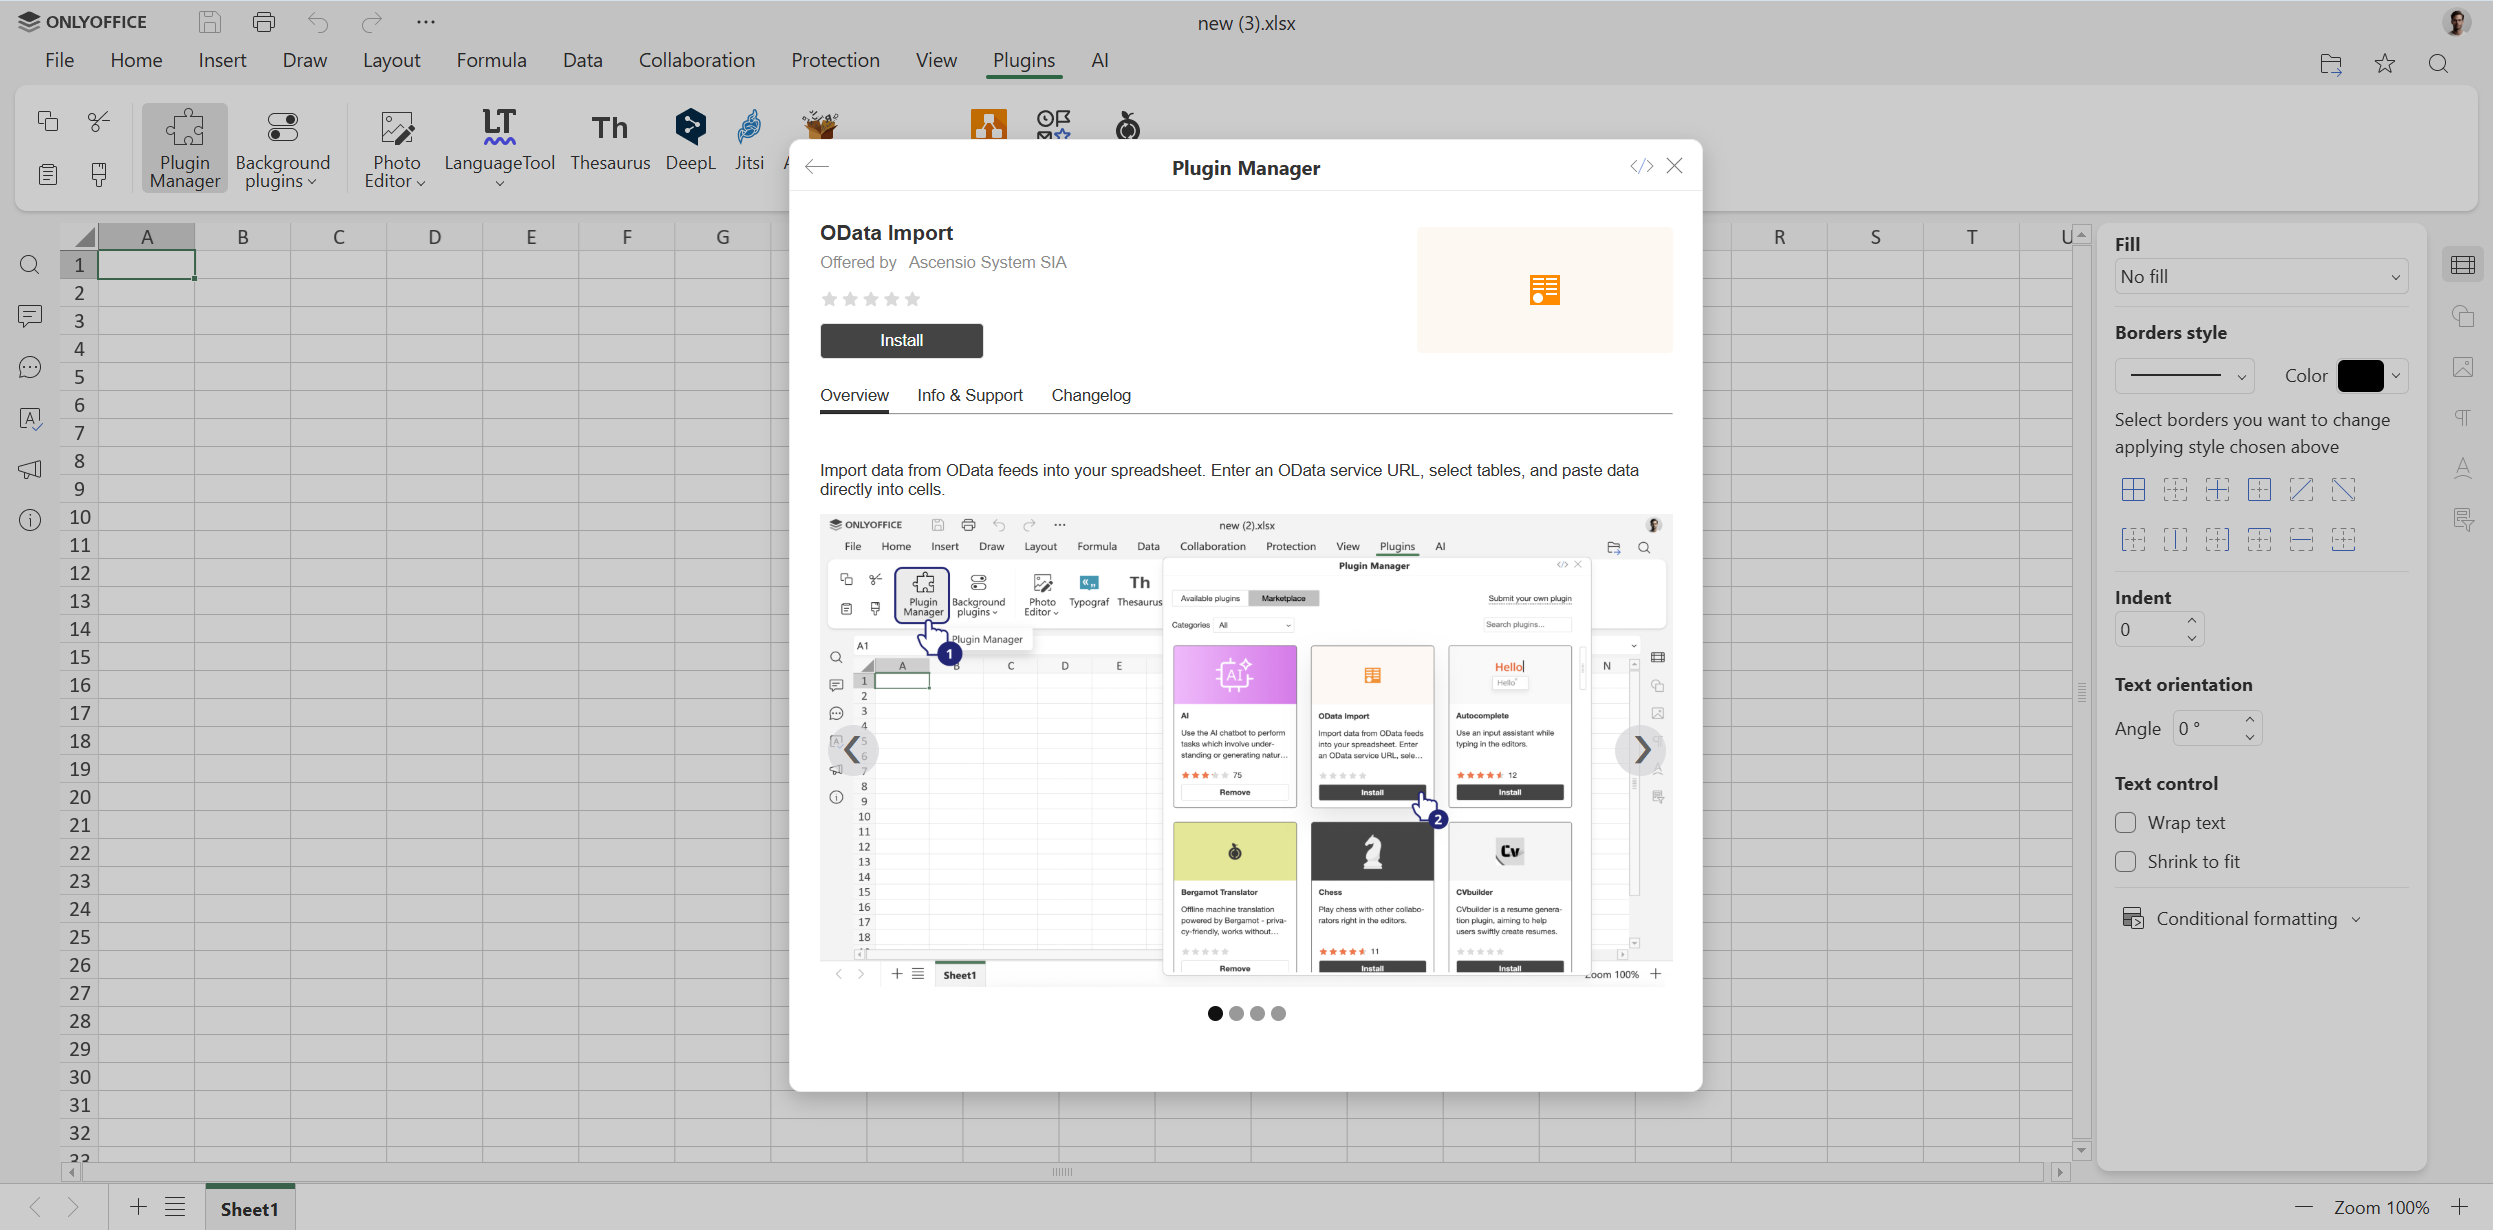
To get started with OData Import in ONLYOFFICE Spreadsheet Editor, you need to install it through the built-in Plugin Manager:
- Open your spreadsheet.
- Go to the Plugins tab and click Plugin Manager.
- Find Odata Import on the list.
- Click Install and close the Manager.
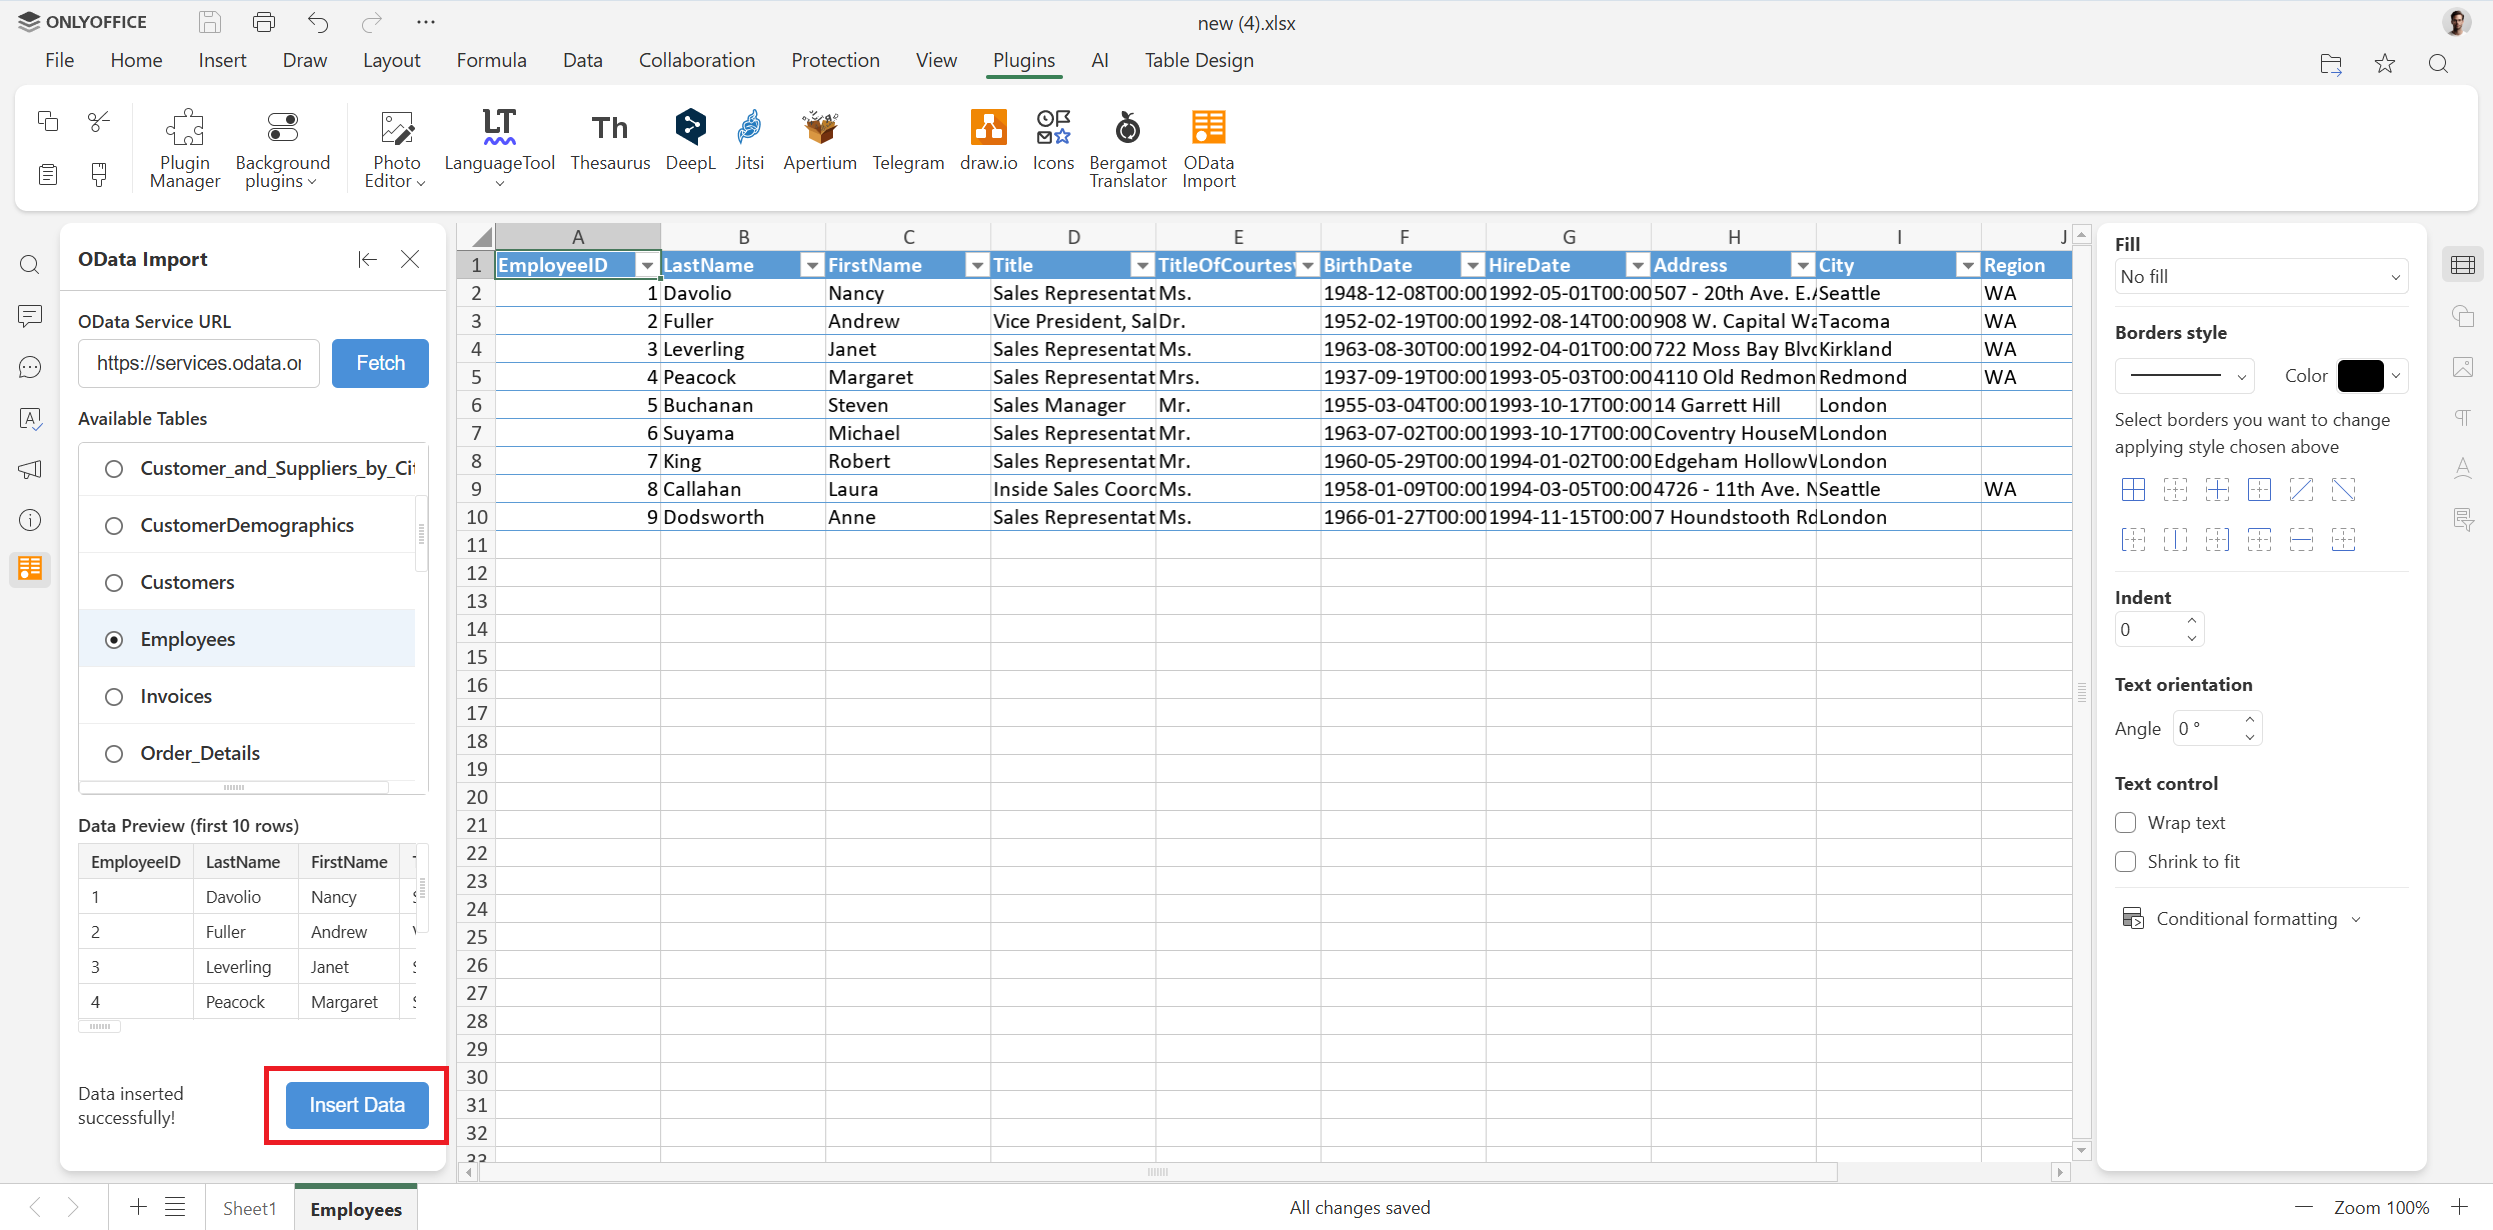
When installed, the plugin can be used to import data from OData services, following these steps:
Step 1. Go to the Plugins tab and click OData Import.
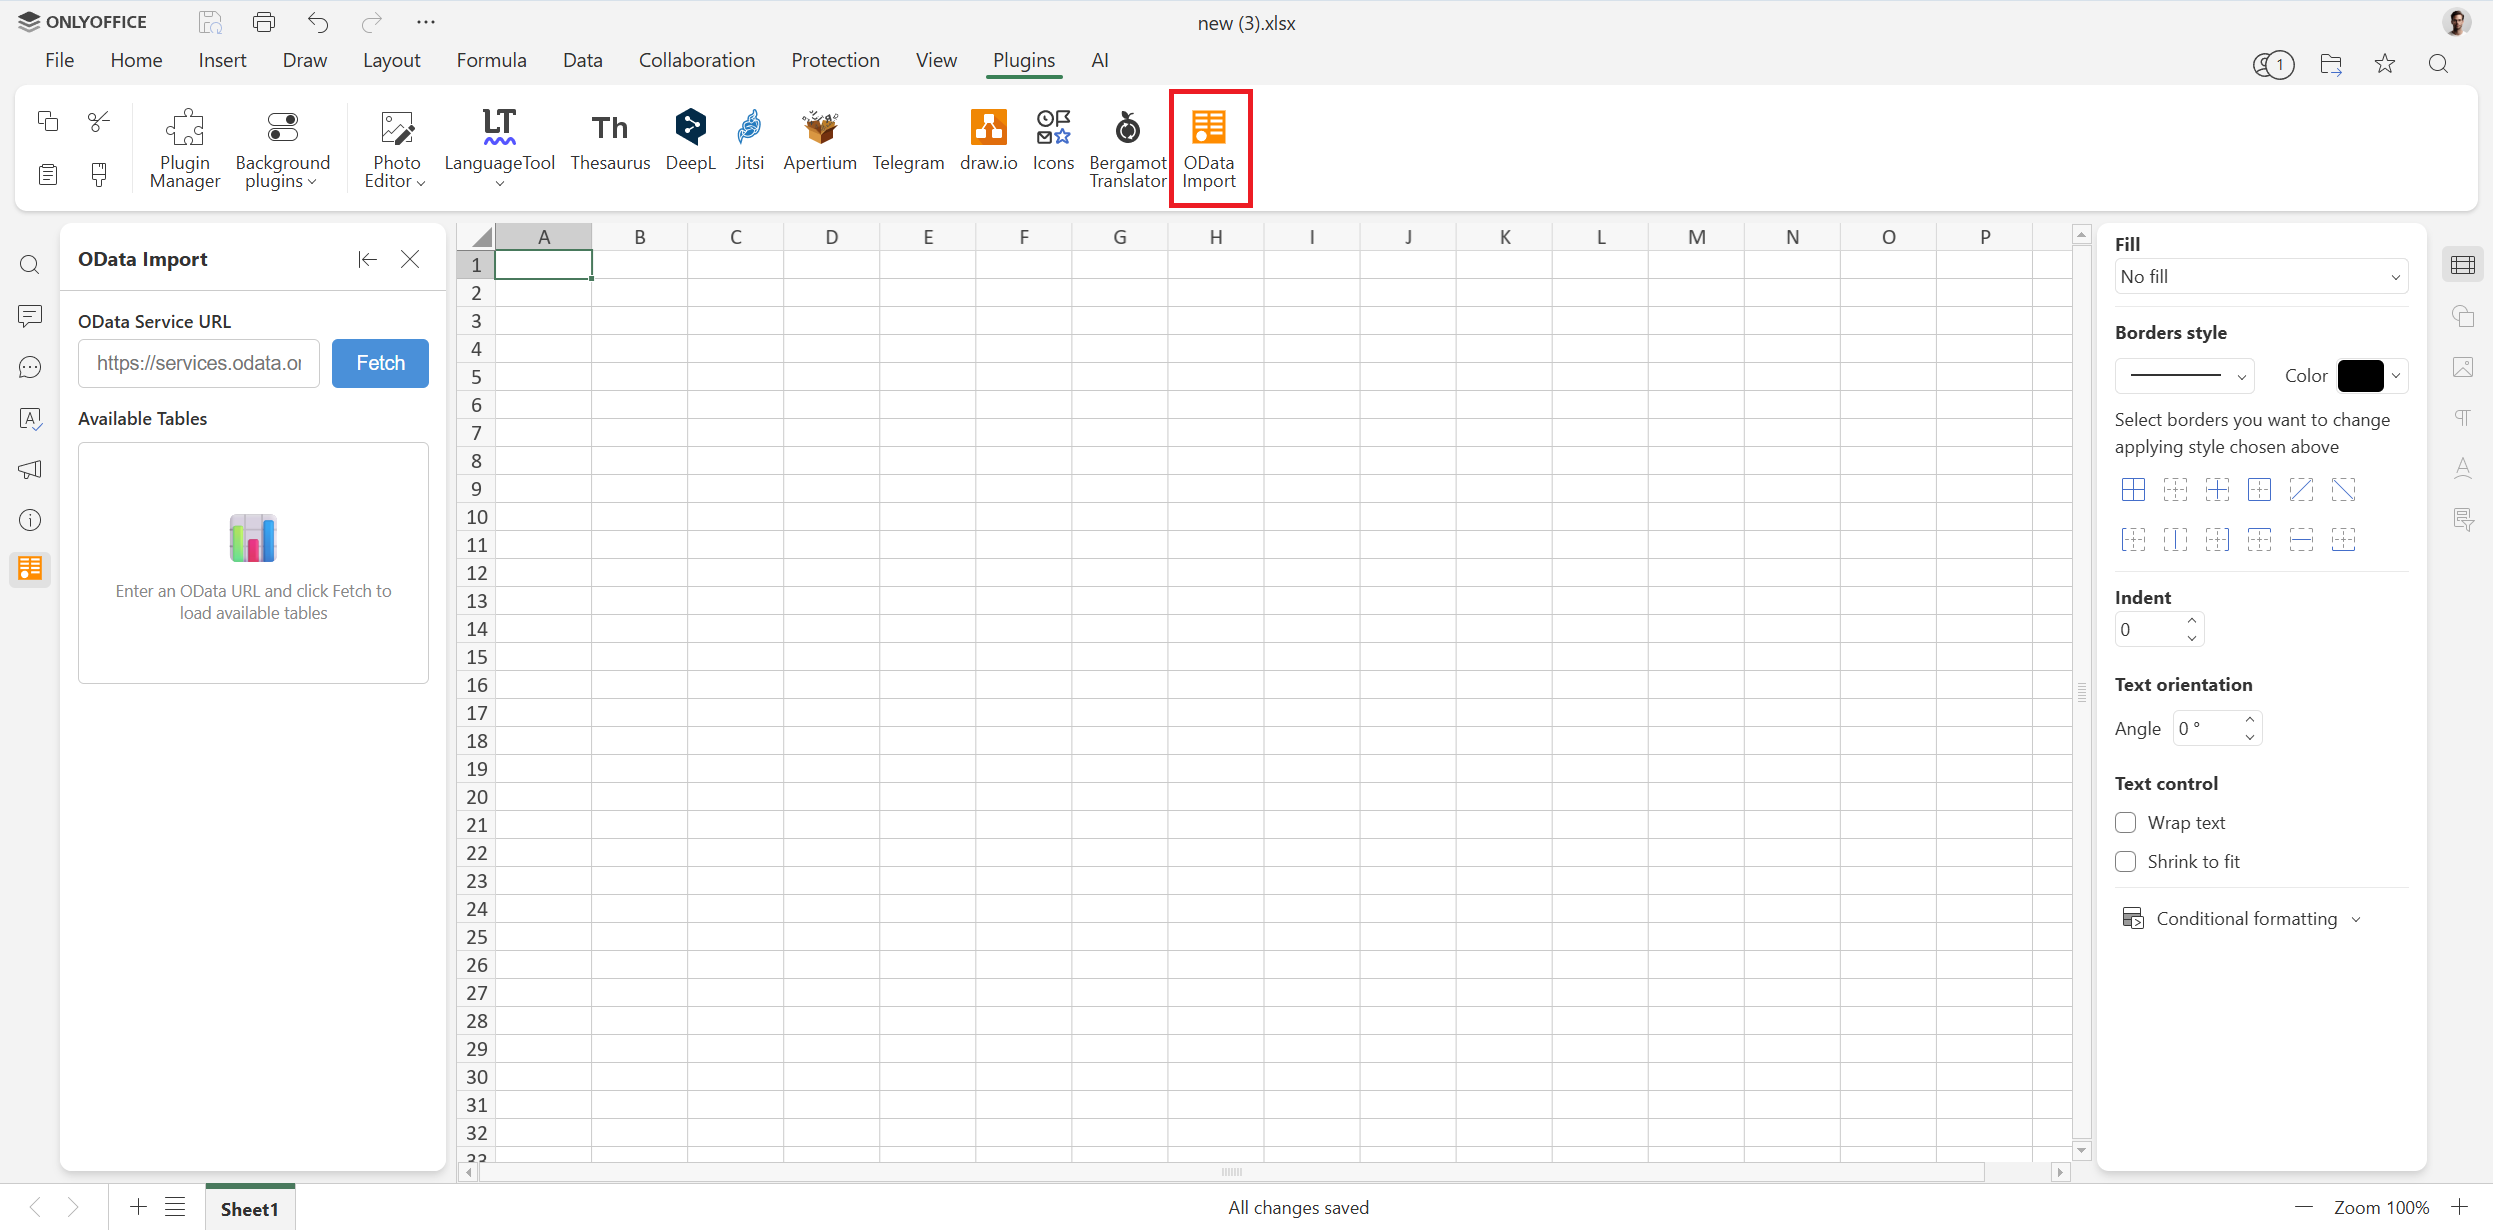
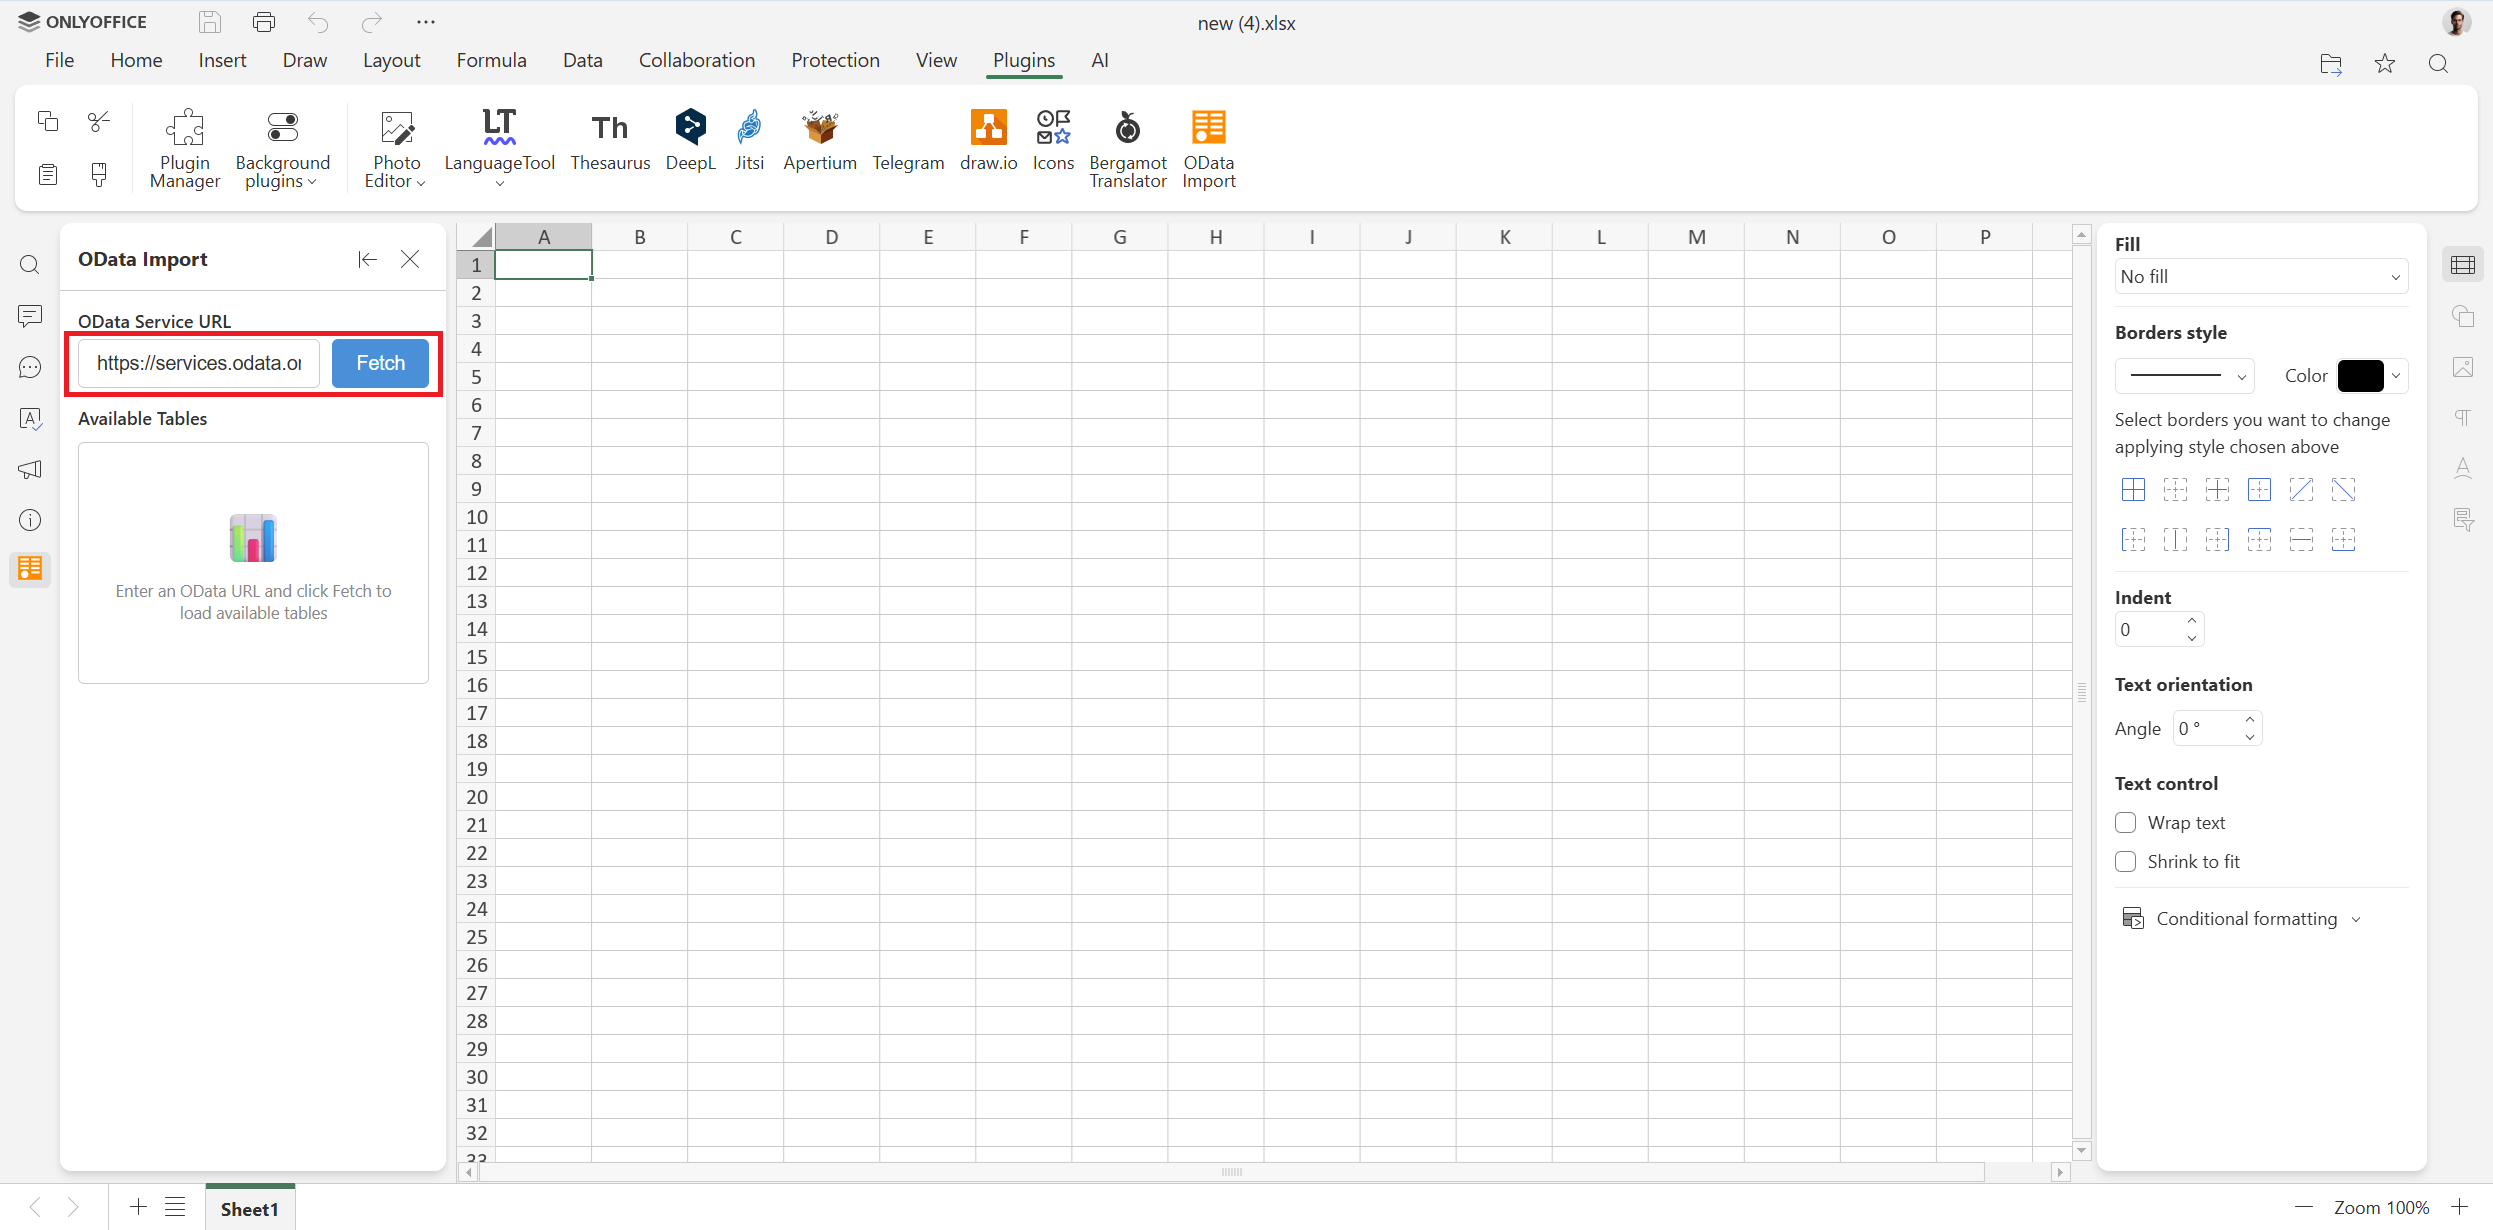
Step 2. Enter an OData service URL in the corresponding field (for example, https://services.odata.org/V4/Northwind/Northwind.svc) and click Fetch.
Step 3. Select a table from the list to preview its data.
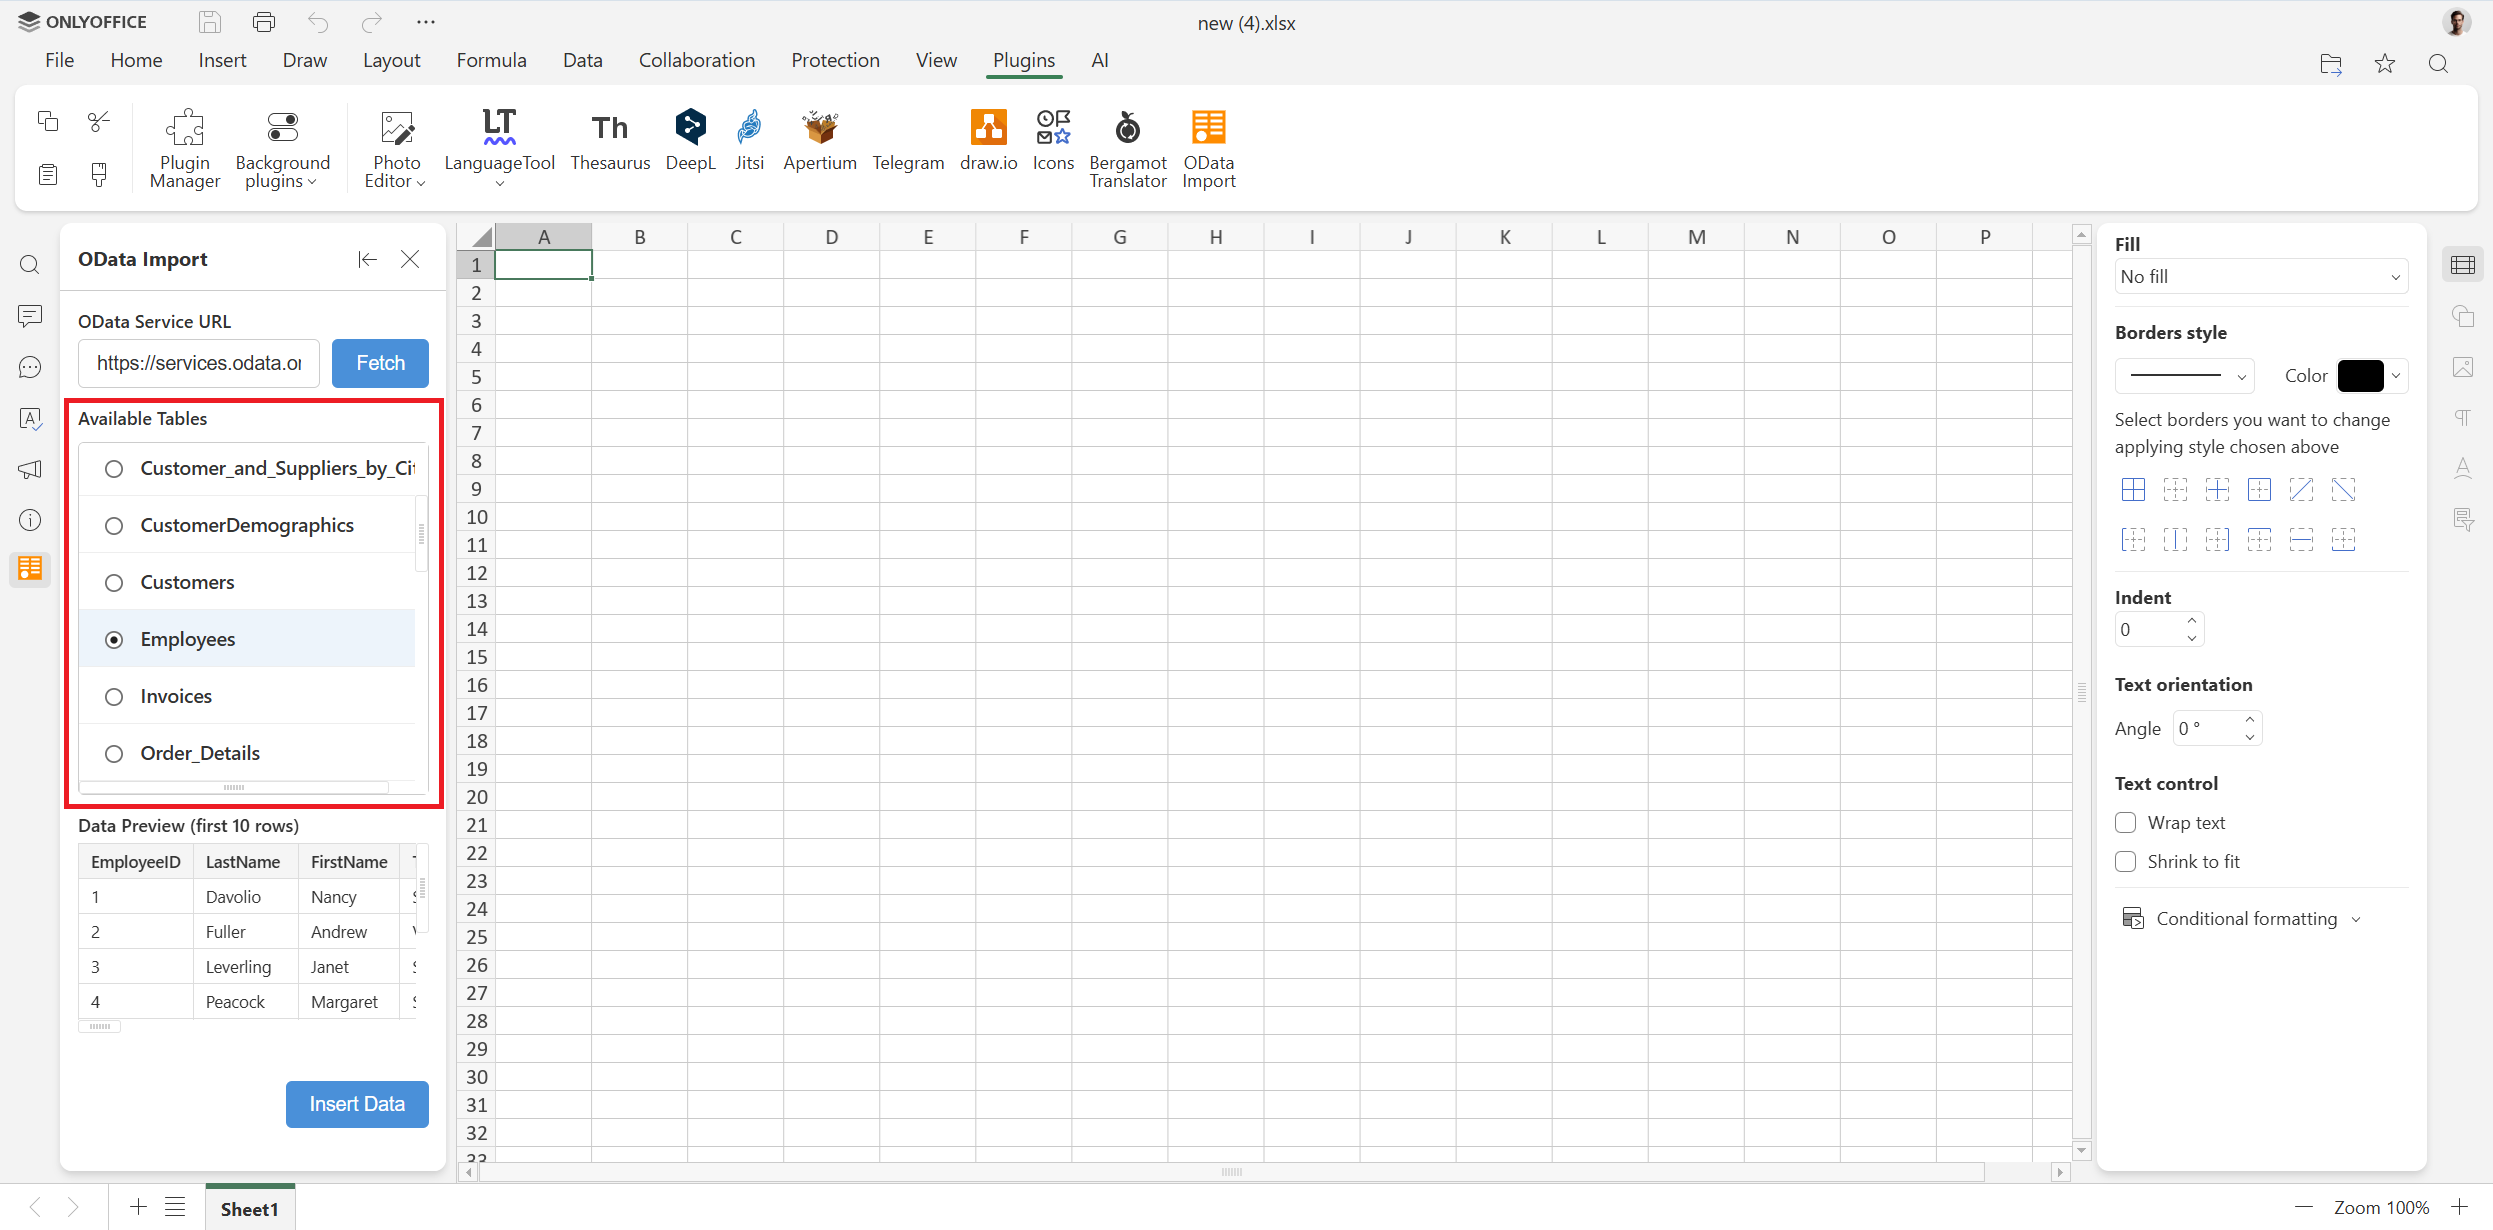
Step 4. Click Insert Data to paste the data into your spreadsheet starting from the current cell.
Now you can easily process the inserted data using the tools and features offered by ONLYOFFICE Spreadsheet Editor — functions and formulas, Solver, conditional formatting, pivot tables, data slicers, charts and sparklines, AI-powered data analysis, macros and more.
Perform complex calculations and manage data in your spreadsheets in the cloud by creating a free ONLYOFFICE DocSpace account or locally on Windows, Linux and macOS:
Conclusion
To conclude, the whole plugin was created by Claude AI, and our developers wrote no line of code manually. They just supervised the process and used the correct prompts to make the AI create the required plugin. Such an approach allows us to create new plugins quickly while concentrating on developing new features for the core functionality of the ONLYOFFICE editors.
We encourage developers and tech enthusiasts to contribute to our project by creating new plugins. Come up with new ideas, ask your AI assistant to write plugin code and make sure it works with our editors. Don’t hesitate to share your plugins with us at marketing@onlyoffice.com.
Useful links
OData Import plugin: Marketplace / GitHub
ONLYOFFICE plugin documentation
Create your free ONLYOFFICE account
View, edit and collaborate on docs, sheets, slides, forms, and PDF files online.