Text bubbles: a big guide
Although a text bubble seems to be a simple element, not everyone knows how to make it. Today we’ll cover what it is and how to do a text bubble from zero or using ready templates.

What a text bubble is and when you can use it
First, it is worth understanding what does it mean. A text bubble, also called a speech bubble, speech balloon, or dialogue balloon is a rounded or irregularly shaped outline filled with text and features a tail pointing toward the speaker.
The concept is well-known thanks to Superman, Batman, and Disney characters who spoke through speech bubbles. In comics, they express the words, thoughts, or emotions of a given character. However, text bubbles have gone far beyond the pages of comic books.
It is widely used in presentations. Want to make your report less boring? Add a text bubble as a design element to your slide, creatively illustrate your words, highlight the main idea, or frame an inspiring quote with it. You can also use them to create memes or cues in visual materials.
In formal documents, text bubbles are often called “callouts” as they are designed to attract the reader’s attention to a specific point or give instructions.

How to create text bubble using ready png
Creating text bubbles for any purpose is not very difficult today. The first and most obvious way is to find a ready speech bubble template in png format on the Internet. For example, download it from Google or find suitable ones on specialized stocks. Many stocks offer free templates for any purpose and to any taste. Then you can add a text bubble to a photo in any image editor.
If you want to use a ready-made speech bubble, make sure it does not violate copyright law.
How to create text bubble online
The easiest and fastest way to create a text bubble is an online service (for example, Phrase it or FlexClip). It does not require any professional skills. All you need is to follow these steps:
- Choose a background picture (You can add a speech bubble to any stock picture or upload a photo from your device);
- Choose a bubble form;
- Place it on the picture;
- Add and edit the text;
- Download the picture on your devices or send it by email.

How to create speech bubble in Word, Excel, and PowerPoint files
The previous methods describe how to add a text bubble to a photo. However, you may need to add it to a text document, spreadsheet, or presentation to make a note, pay attention to a specific statement or give an example. Another reason you might want to know how to add a text bubble is when you already have an illustration inserted into your document, but you want to enhance it. In this case, creating a new image using online services will take more time than doing it directly in the editors.
Let’s see how to make a speech bubble in Word, Excel, or PowerPoint formats with ONLYOFFICE editors.
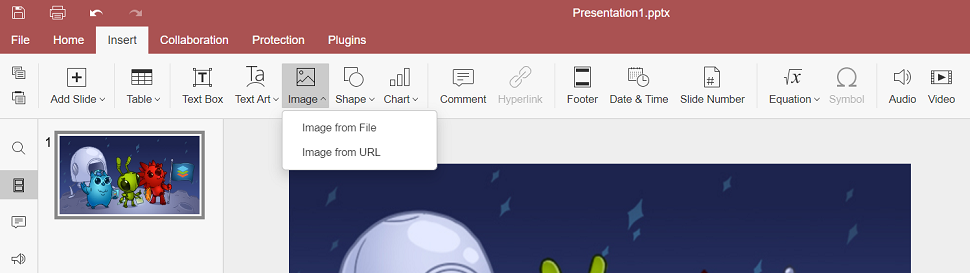
- Using ready png image. If you have a ready-made png image to add to your document, go to Insert —> Image —> Image from File and choose the picture from your device.
- Using shapes in editors. It is also possible to create a text bubble from scratch in document, spreadsheet, or presentation editors using shapes. The task is much easier than it may seem.
The shape feature has different shapes of text bubbles: rectangular selection can be used for quotes, oval callouts often serve as speech balloons, and cloud – for thoughts.
Go to Insert —> Shape —> Callouts and choose the necessary one.
Draw a speech bubble shape on the page. Then, modify its size, make a tail longer or shorter, or change its direction by moving the yellow point. Ideally, the tail should be pointed to the mouth or head of the speaker, if there is an illustration, or to the sentence or part of the text whose brief thought a text bubble expresses.
If you have already set the size and added text to a shape and then decided to choose another shape, there’s no need to delete the shape and start over. Use Change Autoshape option on the right-side toolbar to change the shape but keep the size and text.

How to add text and change font
To add text to a speech bubble, you just need to double-click it and enter the text. To change the font, you can use the usual fonts or apply text art on the right-side toolbar.
There’s a handy feature here. Instead of manually changing the size of the text bubble so that all the text is visible, you can set the automatic adjustment.
Click the shape, go to Advanced Settings, and choose to Resize shape to fit text. That way, after you enter the text, the bubble will automatically resize.

How to change background color or make it transparent
Speaking about text bubbles, we shouldn’t forget the background color, as it also matters. The bubble color helps to convey emotions or feelings. For example, red implies the speaker’s anger and rage.
You can easily change the default background of the shape. Click it and choose another color on the right-side toolbar. It is possible to choose a pattern for the background or make a text bubble transparent or gradient. Just select the desired option from the drop-down list under Fill on the right-side toolbar.

That is how to create a text bubble in different ways. As you noticed, it can be easily done even in document editors, using simple shapes and your imagination. Try it now in ONLYOFFICE Editors:
Create your free ONLYOFFICE account
View, edit and collaborate on docs, sheets, slides, forms, and PDF files online.


